How to pickle vegetables: fermented and quick-pickle methods
A complete guide to pickling vegetables at home, both lacto-fermented pickles (salt brine, no vinegar) and quick vinegar pickles. Covers the best vegetables to pickle, brine ratios, spice combinations, and step-by-step recipes.
TL;DR: Two methods — lacto-fermented (salt brine, 3-5%, 1-4 weeks, produces probiotics) or quick vinegar (ready in hours, sharper flavor, no probiotics). Use firm, fresh vegetables and a kitchen scale for consistent results.
I pickle everything. Radishes from the farmers market that I bought too many of, the last three jalapeños from a bag, carrots that need to be used before they go rubbery. My fridge has at least four jars of pickled something at any given time, and they make everything better: a taco, a grain bowl, a sandwich that would otherwise be boring.
The word "pickling" covers two fundamentally different processes, and understanding the difference is the first step to making great pickles.
Method 1: lacto-fermented pickles
Lacto-fermentation is the traditional method — vegetables submerged in salt brine, where naturally present lactic acid bacteria convert sugars into lactic acid. The acid preserves the food, creates complex flavor, and produces beneficial probiotics. No vinegar involved.
This is the same process behind sauerkraut, kimchi, and traditional dill pickles. If you've read our fermentation beginners guide, you already know the principles. Pickling is just fermentation applied to whole or cut vegetables in brine.
The brine
Salt concentration is the single most important variable. Too little and harmful bacteria can grow before the LAB establish dominance. Too much and the fermentation stalls or the pickles taste like ocean water.
Always calculate by weight: grams of salt per 100g (or 100ml) of water. A kitchen scale is essential here.
Tip: A 5% brine means 50g of salt per liter of water. Dissolve the salt completely in room-temperature water before pouring over vegetables.
Step-by-step: lacto-fermented dill pickles
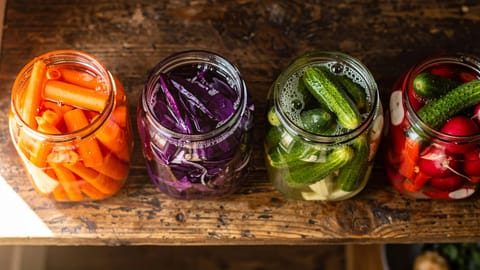
Best vegetables for lacto-fermentation
Not everything ferments equally well. The best candidates are firm, fresh, and have enough sugar for the bacteria to feed on.
| Vegetable | Cut | Brine % | Time | Notes |
|---|---|---|---|---|
| Cucumbers (Kirby) | Whole or spears | 4-5% | 1-4 weeks | Trim blossom end for crunch |
| Carrots | Sticks or coins | 3-4% | 2-4 weeks | Stay very crunchy |
| Radishes | Halved or sliced | 3-4% | 3-7 days | Fast and forgiving |
| Green beans | Whole, trimmed | 4-5% | 1-3 weeks | Pack vertically |
| Cauliflower | Small florets | 3-4% | 1-3 weeks | Absorbs flavors well |
| Jalapeños | Whole or sliced | 3-4% | 1-2 weeks | Gets hotter as it ferments |
| Garlic | Whole cloves | 3-4% | 3-4 weeks | Turns blue-green (normal, safe) |
| Beets | Sliced thin | 3-4% | 1-3 weeks | Colors everything in the jar |
Note: Garlic sometimes turns blue or green during lacto-fermentation. This is a harmless chemical reaction between sulfur compounds in the garlic and trace minerals in the water. It's safe to eat.
Spice combinations that work
Garlic, fresh dill, black peppercorns, mustard seeds. The traditional combo for cucumber pickles.
Garlic, dried chili flakes, cumin seeds, coriander seeds, bay leaf. Great for carrots and cauliflower.
Ginger, garlic, Sichuan peppercorns, star anise, chili. Works with radishes and green beans.
Garlic, oregano, bay leaf, fennel seeds, lemon zest (added after fermentation). Perfect for mixed vegetables.
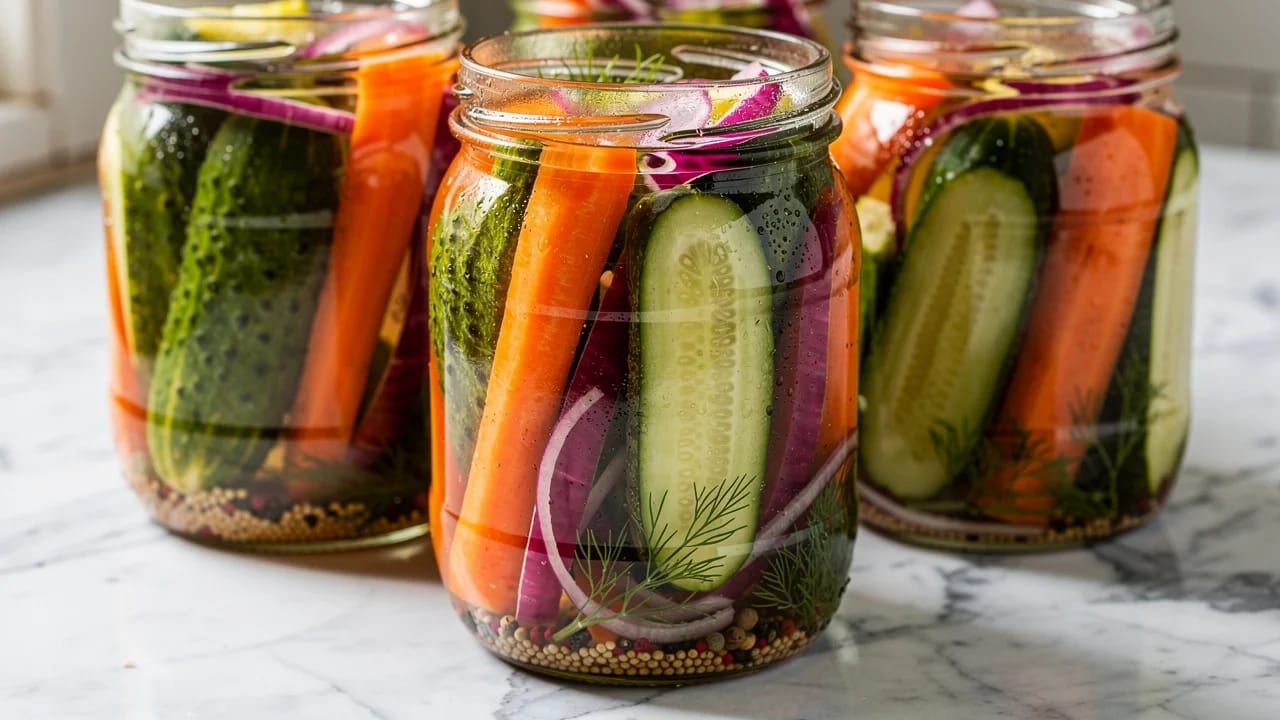
Method 2: quick vinegar pickles
Quick pickles are the fast track. You heat a brine of vinegar, water, salt, and sugar, pour it over prepared vegetables, and refrigerate. Ready to eat in 30 minutes to overnight.
They don't have the complex, layered flavor of fermented pickles, and they lack probiotics. But they're useful when you need pickled vegetables today, when you want a sharper flavor profile, or when you're pickling soft vegetables that don't hold up to fermentation.
The quick-pickle formula
The type of vinegar changes the character:
- White vinegar: sharpest, cleanest, lets vegetables shine
- Apple cider vinegar: mellower, slightly fruity
- Rice vinegar: gentlest, slightly sweet, good for Asian-style pickles
- Red wine vinegar: robust, pairs with Mediterranean spices
Step-by-step: quick pickled red onions
The single most useful quick pickle. Transforms sandwiches, tacos, salads, and grain bowls.
I make a jar of these every Sunday. They go on everything: pulled pork, black bean bowls, avocado toast, next to a fried egg. The vinegar mellows the raw onion bite while the pink color makes any plate look better.
Pickling tips that prevent failures
After hundreds of jars, these are the lessons I've learned the hard way:
Storing your pickles
Lacto-fermented pickles: Once the flavor is where you want it, seal tightly and refrigerate. The cold temperature dramatically slows fermentation, preserving the flavor and crunch for 6-12 months. They'll continue to slowly develop flavor in the fridge.
Quick vinegar pickles: Store in the refrigerator, sealed. Most quick pickles taste best within 2-3 weeks and stay good for up to 2 months. The vegetables gradually lose their crunch over time.
For shelf-stable storage: You need proper water-bath canning with a tested recipe (USDA or Ball guidelines). This involves specific vinegar acidity, headspace, and processing times. Don't improvise. Follow a tested recipe exactly.
Turning pickles into meals
Pickled vegetables aren't just a side dish. They're a flavor tool:
- Grain bowls: pickled radishes or carrots add acid and crunch that balances rich grains and proteins
- Sandwiches: pickled onions or jalapeños cut through fatty meats and cheese
- Tacos: quick-pickled red onions and jalapeños are as essential as the filling
- Charcuterie boards: cornichons, pickled peppers, and pickled garlic round out a cheese and meat spread
- Salads: pickled beets or carrots add color, acid, and texture variety
- Meal prep: a jar of pickled vegetables makes basic rice-and-protein meals vastly more interesting for the whole week
- Two methods: lacto-fermented (salt brine, 1-4 weeks, probiotics) and quick vinegar (ready in hours)
- For lacto-fermentation, use 3-5% salt brine and keep everything submerged
- Trim the blossom end off cucumbers to prevent softening
- Use non-iodized salt and non-chlorinated water
- Start with radishes or cucumbers, the most forgiving vegetables
- A kitchen scale is essential for consistent, safe results
- Pickled vegetables transform basic meals into something worth eating
Sources

Cook smarter
Join the waitlist for Fond. Recipes, meal plans, and a little AI sous-chef that learns how you cook.