
How to season a cast iron skillet: the complete guide
Seasoning is what makes cast iron nonstick, rust-proof, and better with every use. Learn the oven method, stovetop method, best oils for seasoning, and how to fix common problems like sticky residue, flaking, and rust.
Your cast iron skillet can be the best pan in your kitchen or the most annoying. The difference comes down to one thing: how you season it. A well-seasoned cast iron pan is naturally nonstick, shrugs off rust, and gets better every time you cook. Skip the seasoning (or do it wrong), and you'll be scraping stuck eggs off bare metal before switching back to a coated pan.
Cast iron seasoning isn't complicated. It takes about an hour per round, most of it hands-off, and the science behind it is straightforward. This guide covers the oven method, the stovetop method, the best oils ranked for seasoning, how to strip and rebuild a damaged pan, daily care routines, and fixes for every common problem you'll run into.
What is cast iron seasoning, exactly?
Seasoning isn't some mysterious patina or a coating you buy at the store. It's polymerized oil, a thin, hard layer of fat heated past its smoke point until the fatty acid chains break apart and rebond to the iron surface. That chemical process is called polymerization.
Here's what's actually happening: oil gets hot enough that it stops acting like a liquid. It transforms into a plastic-like polymer that grips the metal at a molecular level. Each layer is incredibly thin, we're talking microns. Build up enough layers and you get a dark, smooth, naturally nonstick cooking surface.
This is why your grandmother's cast iron cooks better than a brand-new Lodge. Fifty years of bacon, cornbread, and fried chicken have built up hundreds of micro-layers of polymerized oil. Every time you cook with fat, you're adding to that buildup. New pans need a head start, and that's what deliberate seasoning gives you.
Bottom line: Seasoning = polymerized oil bonded to iron. Not a mystery. Just chemistry you can control.
Do I need to season a new cast iron skillet?
Most cast iron sold today (Lodge, Victoria, Camp Chef) comes pre-seasoned from the factory. The manufacturer applies a thin oil layer and bakes it on during production. You can cook on it right away, and plenty of people do.
But factory seasoning is a single layer. It's functional, not optimal. I've cooked on brand-new Lodge pans straight from the box, and eggs stuck every time until I'd built up a few more layers. Two or three extra oven rounds before your first cook make a real difference. After those rounds, the surface goes from "technically nonstick" to actually slippery.
If you inherited a vintage pan or bought one at a flea market, assume it needs a full strip and reseason (covered below). If it's new and pre-seasoned, you're just topping off what the factory started.
How to season a cast iron skillet in the oven
The oven method builds the most even, durable base layer. It heats the entire pan uniformly, including the cooking surface, exterior, handle, everything, so you get consistent coverage without hot spots.
Tip: After each round, the pan should look a bit darker and more matte. Glossy or tacky? You left too much oil on. Wipe harder next time.
How to season cast iron on the stovetop
The stovetop method is quicker and works well for maintenance, whether it's a touch-up after cooking or a quick layer between full oven sessions.
- Heat the skillet over medium for 2-3 minutes. Warm, not screaming hot.
- Add a thin layer of oil. Half a teaspoon, rubbed across the cooking surface, then wiped almost completely off.
- Bump the heat to medium-high. Let the oil come up until it starts to smoke lightly.
- Hold there for 2-3 minutes. You'll see the surface darken slightly as the oil polymerizes.
- Kill the heat and let it cool. Once it's cool enough to handle, give it one last wipe with a dry paper towel.
This only seasons the cooking surface, not the exterior or handle. For full coverage, use the oven. But for everyday upkeep after a weeknight dinner, the stovetop does the job.
On induction? Same process. Induction heats cast iron with no issues. Start at a medium setting and adjust up, because induction can overshoot faster than gas.
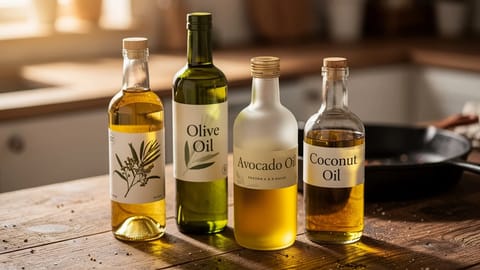
Best oils for cast iron seasoning, ranked
Not all oils polymerize the same way. The best ones for seasoning have a high smoke point and plenty of unsaturated fats, which form stronger polymer bonds than saturated fats. Here's the breakdown.
| Oil | Smoke point | Seasoning quality | Notes |
|---|---|---|---|
| Flaxseed oil | 225°F (107°C) | Hardest finish, but brittle | Creates the hardest polymer layer. Can flake if applied too thick. Divisive: some cooks love it, others find it chips after a few months |
| Grapeseed oil | 420°F (216°C) | Excellent | High in polyunsaturated fats. Durable, even finish. Our top pick for most people |
| Canola oil | 400°F (204°C) | Very good | Cheap, available everywhere, reliable. Hard to go wrong with canola |
| Vegetable shortening (Crisco) | 360°F (182°C) | Very good | The old-school choice. Easy to spread evenly. Builds a classic dark finish |
| Avocado oil | 520°F (271°C) | Good | Sky-high smoke point, but lower in polyunsaturated fats. Handles high oven temps well |
| Sunflower oil | 440°F (227°C) | Good | High smoke point, decent polyunsaturated fat content |
| Olive oil | 375-410°F (190-210°C) | Acceptable | It works, but not ideal. Extra virgin has a lower smoke point and more monounsaturated fats, so polymer buildup is slower |
| Butter | 350°F (177°C) | Poor for seasoning | Fantastic for cooking in a seasoned pan, but milk solids burn at seasoning temperatures. Don't use it for building layers |
| Coconut oil | 350°F (177°C) | Poor for seasoning | Too high in saturated fats to polymerize well |
Our pick: Grapeseed oil or canola oil. Affordable, easy to find, and consistently good results. For a deeper look at how oils behave under heat, check our cooking oil smoke points guide.
How often should you season a cast iron skillet?
If you cook with oil or fat regularly, your pan seasons itself a little with every meal. Day-to-day, that thin oil wipe after cleaning is all the maintenance most pans need.
Full oven seasoning is for bigger interventions. I do a full round two or three times a year, usually when I notice food starting to stick in spots or if the pan sat unused for a while. Here are the signals that it's time:
- Food sticks where it didn't before
- Dull gray patches appear on the cooking surface
- The pan feels rough instead of smooth
- You cooked something acidic and the seasoning looks thin afterward
How to reseason a cast iron skillet
Sometimes the seasoning is too far gone: patchy, flaking in sheets, or caked with gunk. Maybe you picked up a rusty pan at a yard sale. Either way, stripping it down to bare metal and starting over is often the fastest path to a good cooking surface.
When to strip and reseason
- Seasoning is peeling off in large flakes or patches
- Significant rust, beyond a few orange surface spots
- Thick, sticky residue that won't budge with normal scrubbing
- You bought a used pan and want a clean slate
How to strip seasoning
Put the skillet upside down in your oven and run a self-clean cycle: roughly 900°F (480°C) for 3-4 hours. This burns everything down to bare gray metal. Let it cool completely before touching it. Fair warning: your kitchen will smell like a campfire.
Coat the pan with yellow cap Easy-Off, bag it in a garbage bag, seal it, and leave it outside for 24-72 hours. The lye eats through the polymerized oil. Rinse well, hit it with steel wool, then wash with soap and water. Gentler on the pan than the self-clean method.
This is collector territory: restoring antique Griswolds and Wagners. Effective, but you need a dedicated setup with a battery charger or lye tank. Worth it if you're restoring multiple pans; overkill for a single skillet.
Once stripped, bare iron rusts fast. Within hours in a humid kitchen. Dry the pan immediately and start the oven seasoning process right away. Plan on 3-4 rounds to build a solid base before you cook on it.
Daily cast iron care and cleaning
Take care of your seasoning day-to-day and you'll almost never need to strip and start over. The routine takes two minutes and becomes second nature fast.
After every cook
- Clean while the pan's still warm. Run warm water and scrub with a stiff brush, chain mail scrubber, or plastic scraper. Got stubborn stuck-on bits? Dump in a tablespoon of coarse salt and scrub it with a paper towel. The salt works as an abrasive without scratching the seasoning.
- Dry it immediately. Towel dry, then set it on a burner over low heat for 1-2 minutes. Don't skip this. Moisture left on cast iron turns into rust overnight.
- Add a micro-layer of oil. While the pan's still warm from drying, put in a few drops of oil and wipe across the cooking surface with a paper towel. Then wipe it off again, almost dry. This thin film maintains the seasoning between cooks.
The soap question
Go ahead and use soap. Modern dish soap is a mild surfactant: it cuts grease but can't break polymerized oil bonds. The old "never use soap on cast iron" advice comes from a time when soap was made with lye. Lye actually does dissolve seasoning. Dawn and Palmolive? Not even close.
Most of the time, though, you don't need soap. Hot water and a good scrub handles 90% of cleanup. Soap is useful when you've cooked fish or something pungent and want to clear the smell before your next meal.
Storage
- Keep it somewhere dry. A damp stove or humid cabinet is asking for rust.
- Stacking pans? Slip a paper towel or cloth between them so they don't scrape each other's seasoning.
- Storing it for a while? Apply a slightly thicker oil layer than you normally would.
Signs your cast iron is properly seasoned
How do you know when the seasoning is "done"? A few things to look for:
- Surface appearance. A well-seasoned pan is dark with a matte, satin finish. Not glossy (that's uncured oil) and not rough (needs more layers).
- Water test. Flick a few drops of water onto the heated surface. On good seasoning, water beads up and dances. On bare or thin seasoning, it spreads flat and sizzles.
- Food release. Preheat the pan properly, add a bit of oil, and cook an egg. If it slides around without sticking, your seasoning is solid.
- Color. New seasoning starts amber or bronze. That's normal. The deep black comes after weeks of regular cooking. Don't worry about the color early on.
Common cast iron seasoning mistakes
Troubleshooting cast iron seasoning problems
Cause: Too much oil, or the oven wasn't hot enough to fully polymerize it.
Fix: Put the pan back in the oven at 450-500°F (230-260°C) for an hour. The heat finishes the job. Still sticky? Strip it and start over, this time being more aggressive about wiping off excess oil.
Cause: Oil was applied too thick, or flaxseed oil became brittle over time (a known issue with flaxseed).
Fix: Scrub off loose flakes with chain mail or steel wool. Wash, dry on the stovetop, and do 2-3 fresh rounds of oven seasoning with a thinner oil coat. Severe flaking? Full strip and reseason.
Cause: The pan sat wet. Either it wasn't dried properly or it was stored somewhere humid.
Fix for light rust: Scrub with steel wool or a paste of coarse salt and oil. Wash, dry immediately on the stove, and do one round of oven seasoning.
Fix for heavy rust: Full strip (see methods above), then 3-4 rounds of oven seasoning from scratch.
Prevention: Dry on the stove every time. Store dry. Light oil before putting it away.
Cause: Normal. New seasoning starts amber or bronze. The deep black color comes from many rounds of seasoning and regular cooking over weeks and months.
Fix: None needed. Keep cooking. Fatty foods speed this up: bacon, searing steaks, shallow frying. Your pan will darken on its own.
Cause: Not enough seasoning built up yet, or the pan isn't hot enough when you add food.
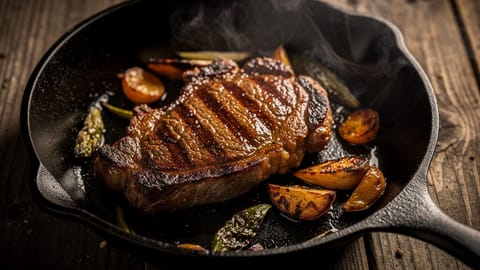
Fix: Preheat for 3-5 minutes over medium heat before adding oil and ingredients. A properly heated, well-seasoned cast iron pan releases food as well as any nonstick. For the crispiest crust and cleanest release, get a strong Maillard reaction going: that browning is what lifts food off the surface.
Cause: Excess carbonized oil that didn't bond properly to the pan surface. Common on pans that were seasoned with too much oil or at uneven temperatures.
Fix: Scrub the affected area with a chain mail scrubber under hot water. Dry on the stove and add one thin round of oven seasoning. The residue looks concerning but isn't harmful.
Season your cast iron right and it lasts forever
Cast iron seasoning comes down to thin oil, high heat, and consistent upkeep after every cook.
- Oven method for building a base: 450-500°F, thin oil, 1 hour, repeat 2-3 times.
- Stovetop method for maintenance: thin oil, heat to smoking, 2-3 minutes.
- Best oils: Grapeseed or canola for reliability. Skip butter and coconut oil.
- Daily care: Clean warm, dry on the burner, wipe with oil.
- Rust and flaking: Usually fixable with steel wool and a fresh round of seasoning.
A well-seasoned cast iron skillet sears, bakes, braises, and moves from stovetop to oven without a second thought. For recipes that take full advantage of that versatility, check out our dutch oven recipes. Pair it with a properly maintained chef's knife and you've got the two most important tools in any kitchen. Take care of them and they'll outlast every other piece of gear you own.
Want to keep your cast iron recipes, seasoning notes, and cooking times organized? Fond keeps everything in one place: technique guides, your personal recipe library, all of it.
Sources

Cook smarter
Join the waitlist for Fond. Recipes, meal plans, and a little AI sous-chef that learns how you cook.
Related articles
Cooking oil smoke points: the complete guide for every cooking method
Every cooking oil has a temperature limit. Push past it and you get bitter flavors, acrid smoke, and potentially harmful compounds filling your kitchen. That temperature limit is called the smoke point, and knowing it is the difference between a perfect sear and a smoking disaster.
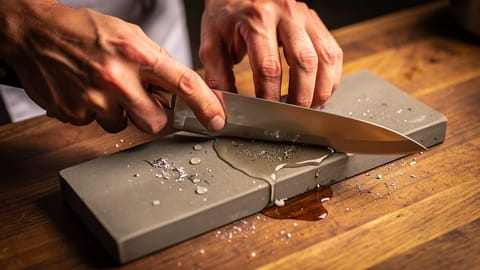
How to sharpen kitchen knives (the right way)
A dull knife demands three to four times more force than a sharp one, which makes it unpredictable. Learn when to hone, when to sharpen, and how to use a whetstone, electric sharpener, or honing rod to keep every blade in your kitchen performing at its best.
Cast Iron Skillet
A heavy, durable pan made from molten iron that excels at heat retention and develops a natural non-stick surface over time.
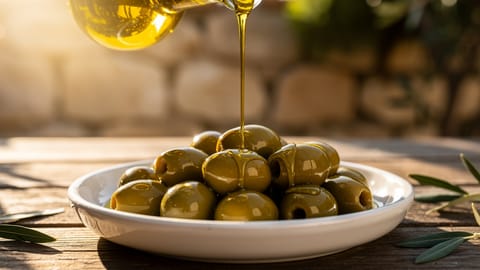
Olive Oil
A versatile cooking fat pressed from olives, available in grades from extra virgin (best for finishing) to refined (best for high-heat cooking).
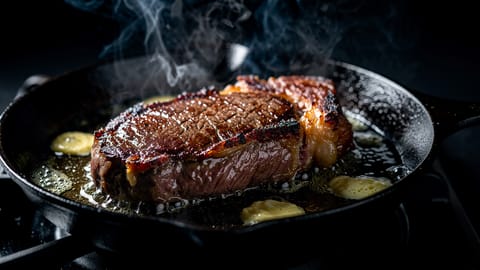
Searing
High-heat browning technique that creates a flavorful Maillard crust on meat, fish, or vegetables.
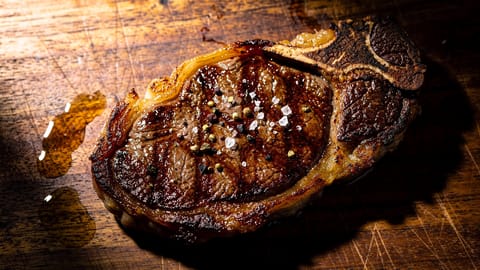
Maillard Reaction
The chemical reaction between amino acids and sugars that occurs when food is heated, creating the brown color and complex flavors of seared meat, toasted bread, and roasted coffee.