 Bastien
How to import recipes from websites into a recipe app
A practical guide to importing web recipes by URL, pasted text, photo, browser extension, or manual entry, with the tradeoffs of each method.
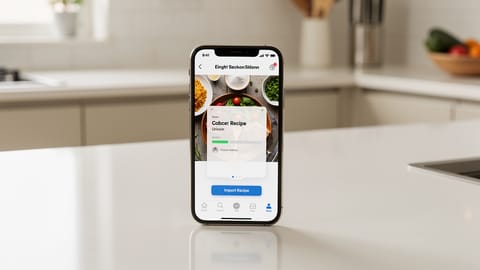
If you want to import recipes from websites, the shortest route is usually to copy the recipe page URL and paste it into a recipe import app. The app reads the page, creates editable ingredients and instructions, and keeps the source link with your saved copy.
That is different from bookmarking. A bookmark saves a route back to a page. A recipe import saves recipe content inside your own library, where you can search it, organize it, and review it before cooking.
The quick answer
If the app cannot read the page, do not keep retrying the same input. Copy the recipe text instead, upload a clear screenshot, or enter the recipe manually. The available fallback depends on the app you use.
Choose the import method that matches the source
There is no single method that wins for every source. URL import removes the most typing from an ordinary web recipe. Text and photo inputs are practical fallbacks. Manual entry remains useful when the source is incomplete or when you want to rewrite the recipe in your own format.
Method 1: import a recipe by URL
URL import is the most direct workflow for a recipe published on the open web. Copy the address and paste it into the app. The importer then builds a draft.
Fond's current import screen accepts a URL as one of its main inputs. It also offers pasted text and photo inputs, and there is no browser extension to install. That matters because pages can be blocked or difficult to interpret, and an importer should give you a way to recover without abandoning the recipe.
URL import works best when:
- the recipe page is publicly accessible;
- the ingredients and instructions are present on the page;
- the URL points to the recipe itself rather than a search result or profile;
- you review the generated recipe before saving it.
It may struggle when a page requires a login or payment, loads key content only after an interaction, or contains several recipes. In those cases, paste the relevant text or use a screenshot you are allowed to save.
Method 2: paste the recipe text
Text import is useful when you already have the recipe in an email, note, document, or message. It can also help with a web page that your recipe app cannot fetch.
Copy only the useful part when possible: title, servings, ingredients, and instructions. Removing navigation, comments, ads, and unrelated story text gives the importer a clearer input. Preserve headings such as "Sauce" or "For the filling" because they may identify separate components.
After conversion, check that ingredient lines were not mistaken for steps and that notes such as “divided” or “for serving” remain attached to the right ingredient.
Method 3: import from a photo or screenshot
Photo import is designed for sources that do not begin as selectable text: a cookbook page, handwritten card, printed sheet, or screenshot. The app first reads the image, then turns the detected text into recipe fields.
Image quality has a direct effect on what can be read. Use even light, keep the full page in frame, avoid shadows across quantities, and take separate photos when a recipe spans multiple pages. Handwriting, fractions, and low-contrast print deserve extra attention during review.
For family recipes, keep the original image even after conversion. The structured version is easier to cook from, while the image preserves corrections, handwriting, and context that may matter later. Our guide to digitally organizing recipes explains how to keep those materials findable.
Method 4: use a browser extension
A recipe clipper adds an import action to a supported browser. It can be convenient if most of your recipe discovery happens on the same computer and the extension connects directly to your chosen recipe manager.
Before installing one, check which browsers it supports, what page access it requests, whether it works on your other devices, and what happens if you change recipe apps. A direct URL workflow avoids an extra installation, while an extension may reduce a few clicks for frequent desktop use.
Method 5: enter the recipe manually
Manual entry is the dependable fallback. It is also the right choice when the source is fragmentary or when an imported draft would require more correction than retyping. You may also prefer it when combining family notes or preserving particular wording.
Use consistent ingredient lines, separate instructions into one action per step, and record servings before adjusting quantities. If you regularly change batch sizes, see our recipe scaling guide before rewriting the original amounts.
What about structured recipe data?
Many recipe pages include machine-readable recipe fields alongside the visible article. Import tools may use that data to identify ingredients, instructions, timing, and servings. It can make extraction easier, but its presence does not guarantee that every field is complete or correct.
From a cook's perspective, the action is the same: import the URL and inspect the draft. You do not need to check the page source or identify which extraction technique the app used.
Compare the tradeoffs
| Method | Best for | Main advantage | What to check |
|---|---|---|---|
| URL import | Public recipe pages | Minimal copying | Missing fields, multiple recipes, page access, source attribution |
| Text import | Emails, notes, documents, messages | You control the input | Lost headings and ingredient notes |
| Photo import | Books, cards, screenshots | Works without selectable text | OCR errors, fractions, page order |
| Browser extension | Frequent browser-based discovery | Import action on the current page | Browser support and permissions |
| Manual entry | Incomplete or heavily edited recipes | Full control | Typing mistakes and omitted details |
The best recipe import app is not the one that promises to handle every source without review. It is the one that supports the sources you actually collect, keeps the original attribution, and makes corrections straightforward. For a broader look at those tradeoffs, compare our guide to the best recipe apps.
Review the imported recipe before cooking
An imported recipe is a draft until you have checked it. Focus on the details where a small error can change the result:
- ingredient quantities, units, fractions, and notes;
- oven temperatures and whether they use Celsius or Fahrenheit;
- servings and pan size;
- ingredient groups for sauces, fillings, toppings, or garnishes;
- the order of steps and any missing resting or chilling time;
- the source name and URL.
Make corrections while the source is still open. This is faster than discovering a missing temperature halfway through cooking.
Build a useful import habit
Importing becomes valuable when each saved recipe lands in a system you can search later. Give the recipe a clear title and add it to one relevant collection. Avoid creating duplicates when you rediscover the same page.
You can then use your recipe manager to find the recipe by name or ingredient rather than searching your browser history. If you are deciding whether to save the content or only keep the link, our guide to saving recipes from websites covers that choice in more detail.
Start with the URL. If the page does not import cleanly, switch inputs, review the draft, and keep the version that will be easiest to cook from next time.