When to add spices during cooking: timing guide for layered flavor
Spice timing changes the flavor of a dish more than most people realize. This guide breaks down the five moments when spices should go in, explains why ground and whole spices behave differently, and covers fresh versus dried herbs.
TL;DR: Most spices go in early, during the fat-cooking stage, so heat and oil can pull out their flavor compounds. Fresh herbs, finishing salts, and a few volatile spices go in at the end. Salt goes in layers throughout. Get the timing right and your food improves without adding more ingredients.
I used to dump all my spices into the pot at the same moment I added liquid. Chili, curry, stew, soup, whatever. Everything at once, right into the simmering broth. For years I wondered why my dishes tasted one-dimensional compared to restaurant versions with the same ingredients.
The answer was timing. Not quantity, not brand, not some secret ingredient. When a spice enters the pan changes how it tastes. A teaspoon of cumin added to hot oil tastes like a different spice than the same teaspoon stirred into simmering water. Both are cumin. Both are the correct amount. Only one actually works.
The five timing windows
Think of cooking as five distinct windows, each suited for different kinds of spices. Knowing which window belongs to which spice is most of the battle.
Window 1: Before cooking starts
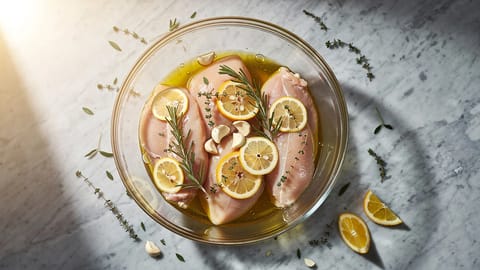
This window is for salt and acidic marinades on proteins. Salt applied ahead of cooking draws moisture to the surface, dissolves into it, and gets reabsorbed into the meat, seasoning it from within. Give steaks and chops about an hour; give a large roast 6 to 24 hours. This is why professional cooks salt their steaks long before the pan hits heat.
Spice rubs applied in this window also benefit from the time. The flavors penetrate the surface layer, and the salt in the rub acts as a carrier. For short cooks like a grilled chicken breast, apply the rub at least 15 minutes ahead. For larger cuts, 1-24 hours is appropriate. Marinades work differently but follow a similar principle of giving flavor time to move into the food.
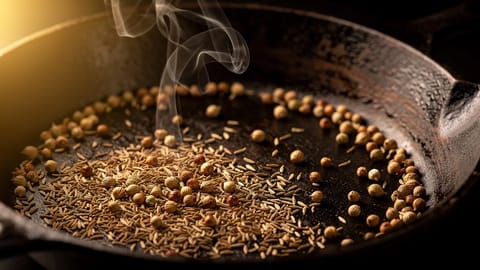
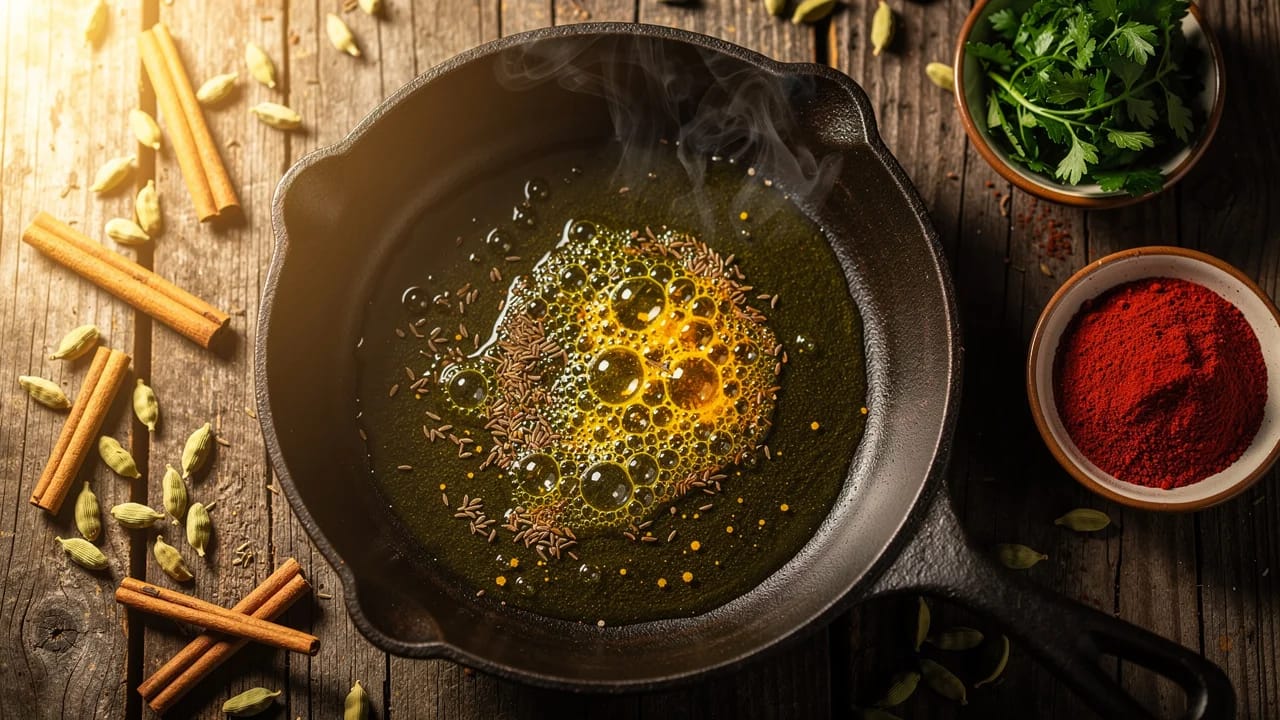
Window 2: Hot fat, no liquid yet
This is the single most important window, and the one most home cooks skip. Your pan is hot, your oil or butter is shimmering, and you add aromatics and whole spices. This is where blooming happens.
Whole spices like cumin seeds, mustard seeds, cardamom pods, and cinnamon sticks go in first. They need a minute or two to release their oils into the fat. Ground spices go in slightly later, after the aromatics (onions, garlic, ginger) have softened. They only need 30-60 seconds before they risk burning.
If you skip this window and dump spices straight into liquid later, fat-soluble flavor compounds stay locked inside the spice. The food science behind seasoning is clear on this: many aromatic molecules in spices dissolve far better in fat than in water. Water-only cooking leaves most of them behind.
Window 3: Building the base
Liquid has been added. The dish is now simmering or braising. This window is for tough dried herbs and spices that need long contact with moist heat to release their flavor: bay leaves, dried oregano, dried thyme, smoked paprika (the whole-flavor-not-garnish kind), star anise, cloves.
Tough herbs with woody stems do their work here. A few sprigs of fresh thyme or rosemary thrown into a braise at this stage release flavor over the course of an hour. You would not toss tender basil or parsley in here because the heat would cook them into nothing.
Window 4: The last 30 minutes
As the dish finishes, some flavors need to be refreshed. Ground spices that were added at window 2 have mellowed into the background, and a second, smaller dose wakes the dish back up. This is especially true for long braises and slow-cooker dishes.
This is also when delicate ground spices like garam masala, Aleppo pepper, or za'atar go in. These are blends built around fragile aromatic oils that evaporate with prolonged heat. Add them early and you cook off the top notes. Add them in the last 15-30 minutes and they stay bright.
Window 5: Off the heat, at plating
Last stop. This is the window for soft fresh herbs (basil, parsley, cilantro, dill, chives, tarragon), finishing salts (flake salt, fleur de sel), citrus zest, sumac, freshly cracked pepper, and chili oil drizzles.
These ingredients live and die by their volatile oils. A few seconds of residual heat, a quick stir, and they are at peak flavor. Longer than that and you start losing what makes them special. Chopped parsley stirred in at window 3 tastes like wet grass. The same parsley added at plating tastes bright and green.
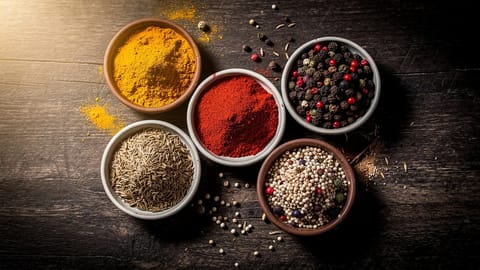
Whole spices vs ground spices
The same spice behaves differently depending on form. A whole cumin seed and a teaspoon of ground cumin call for different timing.
Whole spices have a protective seed coat that buffers them against heat. You can toast them in a dry pan, simmer them in a liquid for an hour, or bloom them in oil without much risk. They release flavor slowly, which is exactly what you want in a long-cooked dish.
Ground spices are the opposite. Massive surface area, no protection, volatile oils ready to evaporate or burn. Hit them with direct dry heat and they go bitter in under a minute. Hit them with fat for 30-60 seconds and they bloom beautifully. The technique of heating them in fat is laid out in the guide on how to bloom and toast spices, and it is the single biggest technique for improving home cooking.
Tip: Buy whole spices when you can. Grind them as you need them. Properly stored spices last far longer whole than ground, and freshly ground tastes noticeably stronger than pre-ground of the same age.
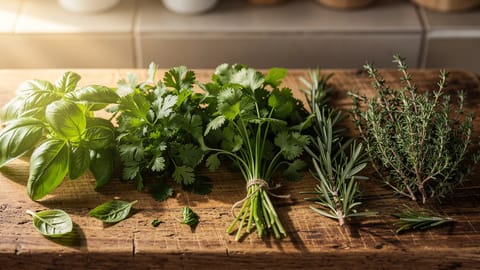
Fresh herbs vs dried herbs
The timing split between fresh and dried herbs trips up a lot of home cooks. They are not interchangeable. The cooking times are actually opposite.
Dried herbs are concentrated, with most of their water already removed. Their flavor compounds are locked in the dried plant matter and need hot liquid and time to re-hydrate and release. They go in early, with the liquid, and benefit from at least 15-20 minutes of simmering.
Fresh herbs split into two camps. Hardy herbs with woody stems (rosemary, thyme, sage, oregano, bay) survive long cooking and can go in at windows 2-3. Soft herbs with tender leaves (basil, parsley, cilantro, dill, chives, mint, tarragon) are fragile. Their volatile oils evaporate fast, and their color fades to drab olive. These go in at the final stretch, ideally off the heat.
A conversion I use when subbing: 1 tablespoon fresh = 1 teaspoon dried, roughly. The flavor profile is not identical (dried oregano tastes earthier and warmer than fresh), but the intensity is in the same ballpark. If you store fresh herbs properly, you can use the fresh form more often without throwing half of it away.
Salt is its own category
Salt breaks the rules of spice timing because it is not really a spice. It is a mineral with two jobs: seasoning and moisture management. Both jobs take time.
Salting in layers is the single biggest habit separating home cooks who struggle with flat food from cooks whose food tastes seasoned. A pinch when you sweat the onions. Another when you add the protein. A third when you add liquid. A final adjustment at the end once the dish has reduced.
Salt added only at the end sits on the outside of the food and tastes sharp and superficial. Salt added in stages dissolves into each layer and seasons from within. The principle is the same as seasoning a steak ahead of searing. Time matters as much as quantity.
Different salts also behave differently by volume. A teaspoon of Morton kosher salt is much saltier than a teaspoon of Diamond Crystal kosher salt, and both are saltier than a teaspoon of table salt. The different salt types guide explains the crystal-size math so you can trust your measurements.
Common mistakes (and how to fix them)
You probably added the ground spices to water instead of blooming them in fat first. Next time, heat oil in the pan, add your ground spices for 30-60 seconds until they turn fragrant and the oil takes on color, then add tomatoes or liquid. This changes everything. If the dish is already done, bloom a pinch of fresh spices in oil in a small pan and stir it in at the end.
Added too early or cooked too long. Soft fresh herbs go in during the last 2 minutes, ideally off the heat. For a tomato sauce, tear the basil and add it after you turn off the burner. For pesto and dressings, always uncooked.
Two things. First, salt the meat 15-20 minutes before cooking, not during. Second, add your dry spices after browning but before any liquid. If you add them while the meat is still pale and releasing water, they will not bloom, and you will taste raw spice dust.
Long cooking mutes delicate flavors. Add a second round of spices in the last 30 minutes: a teaspoon of garam masala, fresh-cracked pepper, lemon zest, or chopped fresh herbs. The first round built the base. The second round wakes it back up.
Added too late, without enough fat to bloom it. Push the beans aside, create a well, add a spoonful of oil, and sprinkle the paprika into the hot oil for 15-30 seconds before stirring it back in. Alternatively, cook a small batch of paprika in oil separately and stir the infused oil into the chili.
How to rescue under-seasoned food
You taste the dish. It needs more spice. What do you do? Most people dump more spice in and hope for the best, which is exactly why rescue attempts often taste worse than the original.
The better move is to bloom the extra spice separately first. Take a small pan, heat a tablespoon of oil or butter, add your ground spices, cook for 30-60 seconds until fragrant, then stir the whole infused fat into the main dish. You get the bloomed flavor without the raw, dusty taste of dumping spices into an already-cooked pot.
Works for curries, stews, soups, bean dishes, and braises. Also works to revive leftover takeout that has lost its punch after a day in the fridge. A quick bloom of fresh spices in butter, stirred into leftover rice or dal, brings everything back to life.
If the dish needs brightness rather than warmth, go the other direction. A squeeze of citrus, a grating of zest, a pinch of flake salt, a drizzle of olive oil, a handful of chopped herbs. Often a flat dish is not missing spice at all. It is missing acid or fat or fresh green, and no amount of extra cumin will fix that. This is where understanding umami flavor and how it interacts with salt and acid also helps.
Practical rules for the next meal
Putting it all together
Pick one dish you cook often. A chili, a curry, a pasta sauce, a weeknight stir-fry. Apply the window framework to that one dish. Bloom your ground spices in oil before the liquid goes in. Add soft herbs at the end. Salt in layers. Then notice what changed.
It is a small adjustment in technique and a big adjustment in result. You do not need fancier spices, a new brand, or an expensive cookbook. You need to think about when each ingredient enters the pan. For the full list of spices worth keeping on hand, see the essential spices for home cooking guide. Good spices used at the wrong time still taste flat. Decent spices used at the right time taste great.
- Most ground spices bloom in fat at the start of cooking, not in liquid later
- Whole spices can go in earlier and survive longer cooking than ground
- Soft fresh herbs go in during the last 2 minutes, off the heat
- Dried herbs need early addition and at least 20 minutes to rehydrate
- Salt in stages throughout the cook, not only at the end
- Long cooks (braises, slow cooker) need a second spice dose near the end
- Rescue under-seasoned dishes by blooming fresh spice in a separate pan and stirring it in
Timing tells you when each spice goes in; the spice pairing chart tells you which ones belong in the pot together in the first place.