Types of knife cuts: the complete guide for home cooks
Professional chefs learn 12+ standard knife cuts in culinary school. Home cooks usually learn zero. That gap shows up on the plate — in uneven cooking, mushy textures, and dishes that never quite look like the recipe photo.
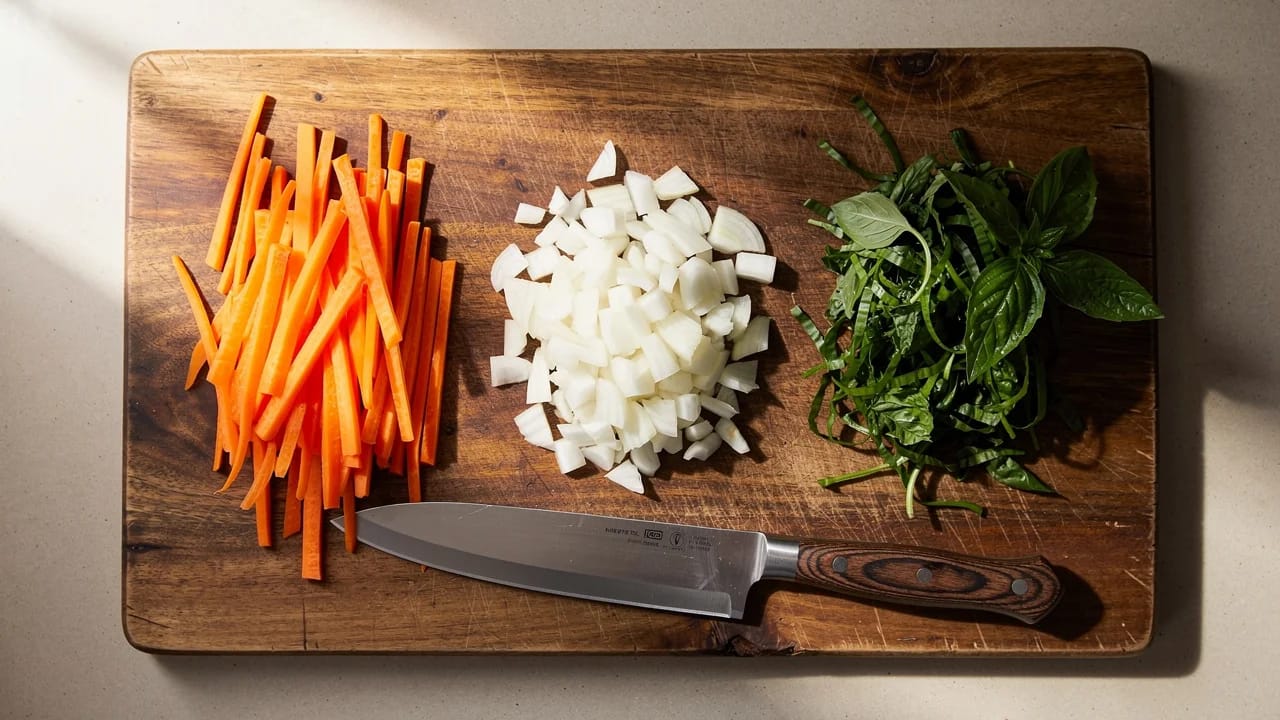
Twelve standard knife cuts separate a trained cook from someone hacking at vegetables. The good news: you don't need culinary school to learn them. A sharp knife, a stable cutting board, and a clear reference for each cut will get you there. This guide covers every major type of knife cut, with exact dimensions, the foods each cut works best for, and step-by-step technique. From nailing a mise en place for a French braise to dicing an onion without tears (okay, fewer tears), it's all here.
I spent years reaching for my phone mid-prep to double-check cut dimensions. Putting this reference together is partly selfish: it's the cheat sheet I wish I'd had pinned to my kitchen wall from day one.
Knife cuts chart: quick reference
Here's the full knife cuts chart with dimensions and common uses. Keep this table somewhere visible.
| Cut | Dimensions | Shape | Best for |
|---|---|---|---|
| Brunoise | 1/8 x 1/8 x 1/8 in (3mm cube) | Tiny cube | Sauces, garnishes, salsas |
| Small dice | 1/4 x 1/4 x 1/4 in (6mm cube) | Small cube | Soups, stuffings, stews |
| Medium dice | 1/2 x 1/2 x 1/2 in (12mm cube) | Medium cube | Roasted vegetables, curries |
| Large dice | 3/4 x 3/4 x 3/4 in (2cm cube) | Large cube | Stews, pot roasts, braises |
| Julienne | 1/8 x 1/8 x 2 in (3 x 3 x 50mm) | Thin matchstick | Stir-fries, salads, garnishes |
| Batonnet | 1/4 x 1/4 x 2.5 in (6 x 6 x 65mm) | Thick matchstick | French fries, crudites |
| Chiffonade | Thin ribbons | Ribbon | Herb garnishes, leafy greens |
| Mince | As small as possible (1-2mm) | Irregular tiny pieces | Garlic, ginger, shallots |
| Rondelle | 1/8-1/4 in thick rounds | Disc | Carrots, zucchini, cucumbers |
| Oblique / roll cut | 1-2 in irregular pieces | Angled | Roasted root vegetables |
| Paysanne | 1/2 x 1/2 x 1/8 in thin flat | Thin square/triangle | Soups, light braises |
| Tournee | 2 in, 7 sides | Football shape | Fine dining presentations |
| Chop (rough) | 3/4-1 in irregular pieces | Irregular | Stocks, mirepoix, rustic stews |
| Slice | Varies by thickness | Flat piece | General cooking, sandwiches |
Knife safety and grip fundamentals
Grip and stance matter more than speed. Get these right first.
The pinch grip
Pinch the blade just above the heel, where metal meets handle, between your thumb and the side of your index finger. Wrap your remaining three fingers around the handle. This grip gives you far more control than grabbing the handle alone, and every professional cook uses it for a reason.
The claw hand
Your non-dominant hand holds the food. Curl your fingertips under, pressing the flat of your knuckles against the blade. Knuckles guide the knife; fingertips stay tucked behind them. Non-negotiable. This single habit prevents more kitchen injuries than anything else.
Stance and cutting surface
Feet shoulder-width apart, board at waist height. Too low and you hunch; too high and you lose leverage. A damp towel under the board keeps it from sliding. Cheap fix, huge difference.
Julienne cut
The julienne produces thin, uniform matchsticks: 1/8 x 1/8 x 2 inches (3 x 3 x 50mm). Versatile, elegant, and the foundation for the brunoise.
How to julienne
Best foods for julienne
Carrots, bell peppers, zucchini, celery, and jicama. Perfect for stir-fries, spring rolls, and salads, anywhere you need quick, even cooking. Julienned carrots benefit from a brief blanch to soften them while keeping their color vibrant.
Brunoise cut
The brunoise is a 1/8 x 1/8 x 1/8 inch (3mm) cube, a julienne turned sideways and diced. The smallest standard dice in classical French cooking, and a test of your knife precision.
How to brunoise
Best foods for brunoise
Carrots, celery, onions, and turnips. Brunoise shines in consomme garnishes, vinaigrettes, and delicate sauces, anywhere you want vegetable flavor without visible chunks. A fine brunoise (1/16 inch) goes even smaller and shows up in haute cuisine plating.
Chiffonade
Chiffonade turns leafy herbs and greens into thin ribbons. The name comes from the French chiffon ("rag"), which tells you everything about what you're after.
How to chiffonade
Best foods for chiffonade
Basil, mint, sage, spinach, sorrel, and kale. Always chiffonade with a sharp knife; a dull blade crushes the cell walls, which turns basil black within minutes. Add chiffonade herbs as a finishing garnish, not during cooking.
Batonnet cut
The batonnet measures 1/4 x 1/4 x 2.5 inches (6 x 6 x 65mm), thicker than julienne and the starting point for small dice. A standard French fry? That's a batonnet.
How to batonnet
Best foods for batonnet
Potatoes (for fries and roasting), carrots, celery, and zucchini. Batonnet is the starting point for small dice: turn the sticks 90 degrees and cut crosswise at 1/4-inch intervals.
Dice: small, medium, and large
The most common knife cut in everyday cooking. Three standard sizes, each with a distinct purpose.
Small dice
1/4 x 1/4 x 1/4 inch (6mm cube). Start from a batonnet, then cut crosswise at 1/4-inch intervals. Use for soups, stuffings, salsas, and grain salads where you want pieces that cook quickly and distribute evenly in every bite.
Medium dice
1/2 x 1/2 x 1/2 inch (12mm cube). The workhorse dice for roasted vegetables, curries, and stews where you want pieces that hold their shape during longer cooking. Cut planks 1/2 inch thick, then sticks, then cubes.
Large dice
3/4 x 3/4 x 3/4 inch (2cm cube). For hearty stews, braises, and rustic preparations where you want substantial vegetable pieces. Root vegetables at this size handle 45-60 minutes of braising without falling apart.
How to dice an onion
The single most useful knife skill in any kitchen. Master this and you'll use it three to four times a week.
Step-by-step: dicing an onion
For a small dice, keep cuts at 1/4-inch spacing; for medium dice, space them at 1/2 inch. This method works for shallots too, just skip the horizontal cuts since shallots are narrower.
How to mince garlic
You'll mince garlic nearly every time you cook. The goal: pieces so fine they dissolve into sauces and dressings, spreading flavor through every bite.
Step-by-step: mincing garlic
Tip: Sprinkle a pinch of coarse salt on the garlic before the rocking step. The salt acts as an abrasive and helps break down the garlic faster. This is how most restaurant cooks do it.
Rondelle cut
The simplest cut in cooking: round slices straight across a cylindrical vegetable. Thickness depends on the cooking method: 1/8 inch for a quick saute, 1/4 inch for roasting, 1/2 inch for grilling.
How to rondelle
Best foods for rondelle
Carrots, zucchini, cucumbers, sausages, and bananas. The diagonal version, slicing at a 45-degree angle, is called a bias cut and creates more surface area for better browning.
Oblique cut (roll cut)
The oblique (or roll) cut creates irregularly shaped pieces with maximum surface area. Two angled faces per piece means more caramelization in the oven and better sauce absorption.
How to oblique cut
Best foods for oblique cut
Carrots, parsnips, and other long root vegetables. This cut is common in Chinese and French cooking for roasted and braised preparations. The irregular shapes with high surface area caramelize beautifully at 425°F (220°C).
Paysanne cut
Paysanne ("peasant style" in French) produces thin, flat pieces roughly 1/2 x 1/2 x 1/8 inch. Unlike other cuts, the shape follows the vegetable's natural form: squares from a carrot, half-moons from a zucchini, triangles from a turnip.
How to paysanne
Best foods for paysanne
Carrots, turnips, leeks, potatoes, and zucchini. Paysanne is the standard cut for rustic French soups like minestrone and for any brothy dish where you want vegetables that cook quickly and sit neatly on a spoon.
Tournee cut
The tournee (or "turned" cut) is the most advanced classical knife cut. It shapes vegetables into seven-sided football shapes about 2 inches long, tapered at both ends. In culinary school, this is the cut that separates beginners from skilled cooks.
I'll be honest: I've butchered more potatoes trying to nail the tournee than I'd like to admit. The trick is a paring knife (not a chef's knife) and slow, controlled strokes. You rotate the vegetable slightly after each curved cut, working your way around until you have seven flat sides.
Best foods for tournee
Potatoes, carrots, turnips, and zucchini. The tournee is mostly a fine-dining presentation cut. For everyday cooking, it's not practical. But if you want to test your knife control, it's the ultimate challenge.
Concasse
Concasse (from the French concasser, to crush) refers to roughly chopped, peeled, and seeded tomatoes. It's less about precision and more about proper prep: removing the skin and seeds first, then chopping the flesh into rough pieces.
How to concasse tomatoes
Concasse is the base for fresh tomato sauces, bruschetta, and anywhere you want clean tomato flavor without skin or seeds.
Chop and rough chop
Not every cut demands precision. A rough chop gives you 3/4 to 1-inch irregular pieces, deliberately uneven, fast, and perfectly suited for plenty of cooking tasks.
When to chop instead of dice
- Stocks and broths. The vegetables get strained out. Exact size doesn't matter; total surface area does.
- Mirepoix. For dishes where the aromatics cook down and dissolve into the sauce.
- Rustic preparations. Chunky soups, stews, and sheet pan dinners where uniformity isn't the goal.
A rough chop takes seconds. A brunoise takes minutes. Know when precision matters and when it doesn't, that's the real knife skill.
Slice
The most general knife cut: flat, even pieces of consistent thickness. Technique shifts depending on the food.
- Proteins: Slice across the grain for tenderness. Against the grain shortens the muscle fibers, making each bite easier to chew.
- Bread: Use a serrated knife and let the blade do the work. No downward pressure.
- Tomatoes: Use a sharp, thin blade. A dull knife crushes the flesh instead of cutting through the skin.
- Herbs: Stack and slice rather than chopping repeatedly. Repeated chopping bruises delicate leaves and turns them dark.
Consistency matters more than speed here. Even 1/4-inch potato slices cook at the same rate. Throw in a mix of 1/8-inch and 1/2-inch slices and you'll pull some out burnt, others still raw.
Choosing the right cut for your recipe
Every knife cut solves a specific cooking problem. The right choice comes down to three factors:
Cooking time drives cut size. Smaller cuts cook faster. A brunoise of carrot softens in 2-3 minutes; a large dice takes 15-20 minutes. Match the cut to the cooking method and timing. If everything in a stir-fry needs to be done in four minutes, everything should be julienned or sliced thin.
Presentation drives cut shape. A julienne of basil on a pasta dish looks refined. A rough chop looks rustic. Neither is wrong; they signal different intentions.
Uniformity drives even cooking. This is the real reason culinary schools teach classical cuts. When every piece is the same size, every piece finishes cooking at the same moment. No burnt edges, no raw centers.
When organizing your recipes, pay attention to how recipes specify their cuts. Learning how to read a recipe properly means catching these details before you start cooking. "Diced onion" is vague. "1/4-inch diced onion" tells you exactly what the recipe developer intended and helps you replicate their results.
You can also use a unit converter to translate between metric and imperial measurements when following recipes from different regions. Classical French cuts use metric; American recipes often use inches.
Which knife for which cut
Not every cut requires the same tool. After testing dozens of knives over the years, here's what I've landed on:
- 8-inch chef's knife: Handles julienne, dice, mince, chop, and slicing. The workhorse. If you own one good knife, make it this one.
- Paring knife: Better for tournee, fine detail work, and small items like garlic cloves and shallots.
- Serrated knife: Bread and tomatoes only. The serrations grip where a smooth blade would slip.
- Mandoline: Not a knife, but worth mentioning. For perfectly uniform rondelles and julienne at speed, nothing beats it. Just use the guard.
Keep your knives sharp. A sharp blade requires less force, gives you more control, and is paradoxically safer.
Build your knife skills with practice
Muscle memory beats memorization. Start with the cuts you use most (dice, mince, slice) and branch out as they become second nature.
- Prioritize accuracy over speed. Speed follows confidence, and confidence follows precision. Slow, uniform cuts first. Pace comes later.
- Buy practice vegetables. A bag of carrots costs next to nothing and gives you dozens of reps on julienne, brunoise, and batonnet.
- Cook what you cut. Toss practice scraps into a soup, stock, or stir-fry. Ugly cuts taste the same.
- Hone before every session. A few strokes on a honing steel straightens the edge and keeps you cutting cleanly. Hit the whetstone every few months for a full sharpening.
- Learn dice, mince, and slice first; they cover 80% of home cooking
- Uniform cuts ensure even cooking; match cut size to cooking time
- The pinch grip and claw hand are non-negotiable safety habits
- A sharp 8-inch chef's knife handles most cuts
- Tournee and concasse are advanced but worth knowing
- Practice on cheap carrots and cook what you cut
Sources

Cook smarter
Join the waitlist for Fond. Recipes, meal plans, and a little AI sous-chef that learns how you cook.
Related articles
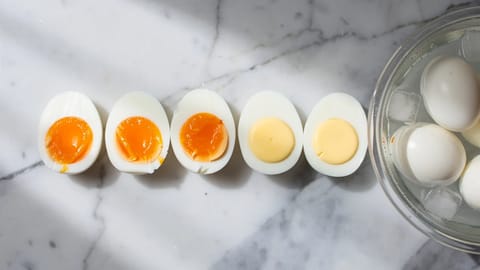
How long to boil eggs for soft, medium, and hard yolks
The difference between a runny, jammy, or fully set yolk comes down to minutes. Knowing how long to boil eggs removes the guesswork and gives you the exact result you want, every single time.
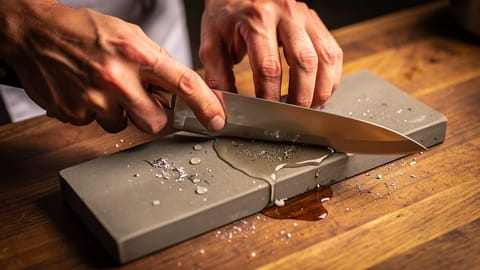
How to sharpen kitchen knives (the right way)
A dull knife demands three to four times more force than a sharp one, which makes it unpredictable. Learn when to hone, when to sharpen, and how to use a whetstone, electric sharpener, or honing rod to keep every blade in your kitchen performing at its best.
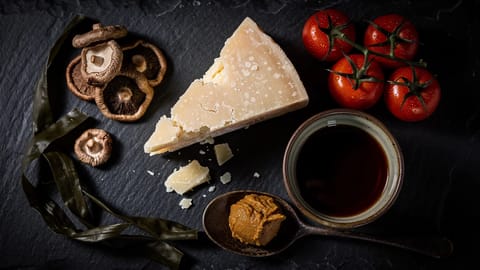
What is umami? The fifth taste explained for home cooks
You know the taste. That deep, savory richness in a slow-cooked broth, a chunk of aged parmesan, or a spoonful of miso stirred into soup. It's the reason tomato sauce tastes better after simmering for hours and why a dash of soy sauce transforms a stir-fry. That taste has a name: umami.
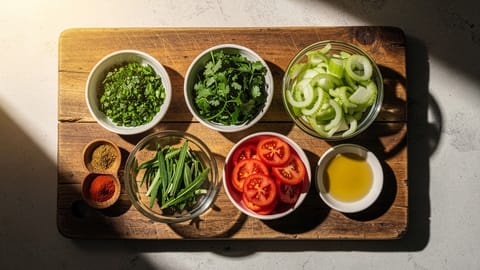
Mise en Place
The practice of preparing and organizing all ingredients before cooking — everything in its place.
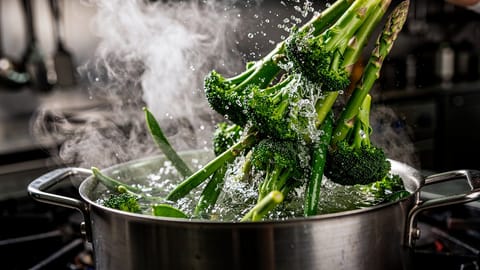
Blanching
Briefly boiling food then plunging it into ice water to stop cooking — used to preserve color, texture, and nutrients.
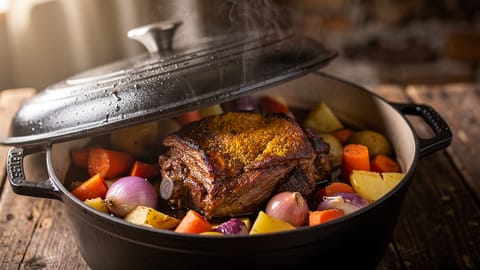
Braising
A slow-cooking method that sears food at high heat, then simmers it in liquid in a covered pot until tender.