 Bastien
How to make a sourdough starter from scratch
A day-by-day guide to creating and maintaining a sourdough starter at home using flour and water. Covers feeding schedules, signs of activity, why a starter stops rising and how to fix it, and how to know when it is ready to bake with.
A sourdough starter is a jar of flour and water that captures wild yeast and bacteria from its environment. Feed it regularly and it becomes a living leavening agent, no commercial yeast needed. The process takes about 7 days, costs almost nothing, and once established, a starter can last for decades.
This guide covers every day of that first week, what to look for, what to do when the starter is not rising, and how to maintain it long after it is up and running.
What a sourdough starter actually is
A sourdough starter is a stable culture of wild yeast and lactic acid bacteria. The yeasts most often found in mature starters are Kazachstania humilis (formerly called Candida milleri) and, early on, Saccharomyces cerevisiae. The signature bacterium is Fructilactobacillus sanfranciscensis, which you will still see written under its old name, Lactobacillus sanfranciscensis. These organisms live in a symbiotic relationship: the bacteria produce acids that create an environment hostile to harmful microbes but favorable to the wild yeast. The yeast produces CO2 (which leavens bread) and the bacteria produce lactic and acetic acids (which give sourdough its characteristic tang).
You are not creating these organisms. They already exist on the grain, in your flour, and in your kitchen. You are giving them the right conditions to multiply and stabilize into a predictable culture.
What you need
- Flour: Whole wheat or whole rye for the first 3-4 days (the bran and germ carry more wild yeast and bacteria). Then switch to all-purpose or bread flour for ongoing feedings.
- Water: Room-temperature tap water usually works. If your water is heavily treated and smells strongly of chlorine, use filtered or bottled water instead. King Arthur Baking's starter recipe makes the same call.
- A jar: A wide-mouth glass jar (500 ml / 1 pint or larger). Glass lets you see activity. Avoid metal. Acids in the starter can react with it.
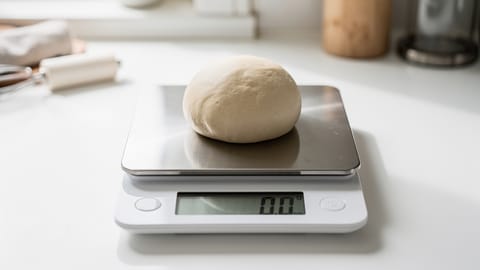
- A kitchen scale: You need to measure by weight. Volume measurements are too imprecise for starter maintenance.
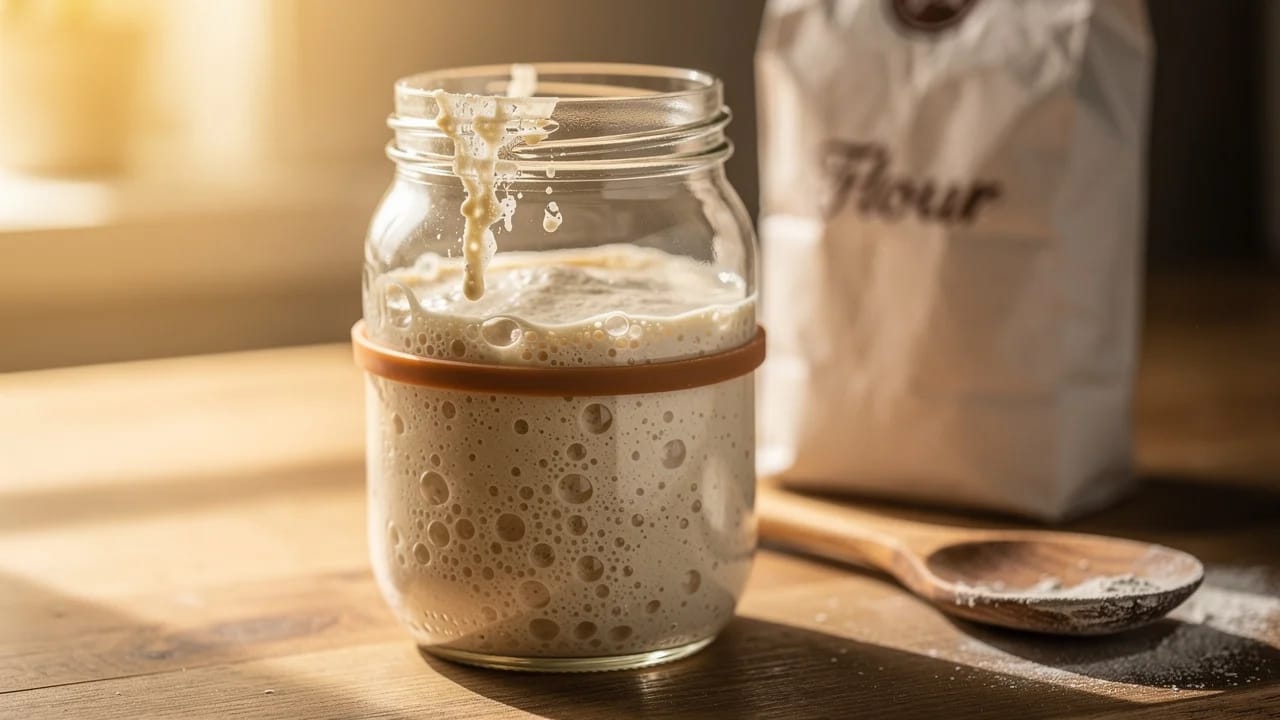
- A rubber band or tape: To mark the level after each feeding so you can track rise.
Total cost: a bag of flour and a jar. That is it.
Day-by-day guide
The schedule below assumes a kitchen around 21-24°C (70-75°F). Cooler kitchens stretch every step; warmer ones compress them. Watch the starter, not the calendar.
Day 1: Mix and wait
Combine 50g whole wheat flour and 50g room-temperature water in your jar. Stir until no dry flour remains. The consistency should be like thick pancake batter. Mark the level with your rubber band, cover loosely (the lid resting on top but not sealed, you want air exchange but not a crust forming), and leave it at room temperature (21-24°C / 70-75°F).
Nothing visible will happen today. That is normal.
Day 2: First signs (maybe)
Check your jar. You might see a few small bubbles on the surface or along the sides. You might see nothing. Both are fine.
Feeding: Discard all but 50g of the mixture. Add 50g whole wheat flour and 50g water. Stir, mark, cover.
Why discard? Without discarding, you would need exponentially more flour to maintain the right ratio of food to organisms. Discarding keeps the culture manageable and ensures the microbes always have fresh food.
Day 3: The false rise
Around day 3, many starters show a burst of activity: lots of bubbles, maybe even doubling in size. This is usually the work of early colonizing bacteria (Leuconostoc and relatives), not the yeast and lactobacilli you want. These bacteria produce gas aggressively but cannot sustain a bread rise. They also make the starter smell strongly, like overripe fruit or even vaguely like cheese.
Do not get excited yet. This activity will likely die back on days 4-5 as the environment becomes more acidic and the early colonizers are replaced by the target organisms. Studies of new starters describe the same succession: atypical bacteria dominate the first two days, then sourdough-specific lactic acid bacteria outcompete them between days 2 and 5.
Feeding: Same as day 2. Discard to 50g, add 50g whole wheat flour and 50g water.
Day 4: The quiet period
Activity often drops off. The starter may look flat, smell sour or like acetone (nail polish remover), and show few bubbles. This is the transition period. The acid-tolerant yeast and bacteria are outcompeting the initial colonizers.
This is the day most people think they failed. You did not fail. Keep feeding.
Feeding: Switch to all-purpose or bread flour from here on. Discard to 50g, add 50g all-purpose flour and 50g water.
Day 5-6: Recovery
Bubbles return. The starter starts rising predictably after feedings, maybe not doubling yet, but showing consistent activity. The smell shifts from sharp and acetone-like to mildly tangy and slightly sweet, like yogurt or ripe apples.
Feeding: Continue once daily. Discard to 50g, add 50g all-purpose flour and 50g water.
If it is warm in your kitchen (above 24°C / 75°F), you may need to feed twice a day to prevent the starter from exhausting its food supply and becoming overly acidic. King Arthur's recipe moves to twice-daily feedings from day 3 for the same reason.
Day 7: Ready to bake
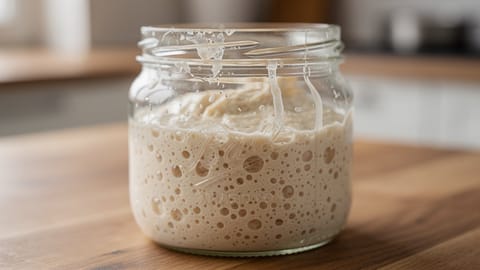
By day 7 (sometimes day 8-10 in cooler kitchens), your starter should be reliably doubling within 4-8 hours of feeding and showing consistent bubble structure throughout. At warm room temperature, King Arthur puts the healthy range at 6 to 8 hours to double.
A mature starter at its peak:
- Has doubled (or more) from its marked feeding line
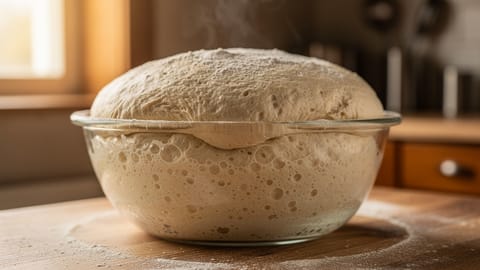
- Is domed on top, full of bubbles
- Smells pleasantly sour, like yogurt, not like acetone
- Has a web-like structure when you pull at it with a spoon
About the float test: Dropping a spoonful of starter into water and watching it float is a popular check, but King Arthur tested it and found that a growing, not-yet-ripe starter floats too. Treat a float as a hint. Reliable doubling is the real test.
Feeding schedule once established
| Scenario | Feeding ratio | Frequency |
|---|---|---|
| Baking frequently (2-3x/week) | 1:5:5 (10g starter : 50g flour : 50g water) | Once daily, room temp |
| Baking weekly | 1:5:5 | Once a week, keep in fridge between bakes |
| Not baking for a while | 1:5:5 | Once a week in the fridge, discard and feed |
The "1:5:5" ratio means for every 1 part starter, you add 5 parts flour and 5 parts water by weight. Higher ratios (1:10:10) give the starter more food and a longer rise time, which is useful in warm climates or when you need to delay baking.
Fridge storage: A cold fridge (3-4°C / 38°F) slows fermentation dramatically. Feed your starter, let it sit at room temperature for 1-2 hours until it just starts to show activity, then refrigerate. It will keep for a week or more without feeding. Pull it out the night before you want to bake, feed it, and let it peak at room temperature.
Troubleshooting
Most starter problems come down to temperature, food, or timing. Work through them in that order before deciding anything is wrong with the culture itself.
Starter is not rising at all after 7 days
Seven days is a typical timeline, not a deadline. Before you start over, check these in order. King Arthur's troubleshooting guide lists the same suspects.
- Temperature too cold. Below about 20°C (68°F) fermentation slows a lot. At 24°C (75°F) and above, a healthy starter doubles in 6 to 8 hours. Find a warmer spot: on top of the fridge, in the oven with the light on (not the heat), or in a microwave with a cup of hot water replaced every few hours. Feeding with slightly warm water (27-32°C / 80-90°F) helps too.
- Not enough food. White flour alone is thin rations for a new culture. Add whole wheat or rye at 10-20% of the flour in each feeding.
- Irregular feedings. A new starter that gets fed on a schedule for another week will usually settle into a rhythm. A new starter that gets fed when you remember often will not.
- Heavily treated water. If your tap water smells strongly of chlorine, switch to filtered or bottled water.
- Old or heavily processed flour. Try a different bag. Organic whole grain flour from a small mill tends to carry more wild yeast.
Starter is bubbling but not rising
Bubbles prove there is fermentation. Rising needs two more things: enough yeast to make gas quickly, and a batter thick enough to trap it. A starter that is too thin lets the gas escape, so make sure you are feeding equal weights of flour and water, not equal volumes. Then add some whole grain flour, keep it around 24°C, and give it a few more days. The bar to clear is reliable doubling, not bubbles.
Starter rose on day 3, then went flat on day 5
That is the false rise followed by the quiet period described above. The early bacteria are dying back and the yeast has not fully taken over yet. Keep feeding on schedule. Most starters come back within two to three days.
Starter smells like acetone or nail polish
The acid-producing bacteria have outpaced the yeast, usually because the starter is too warm, too liquid, or ran out of food. Feed it with a higher ratio (1:10:10) and keep it slightly cooler. The smell should normalize within 2-3 feedings.
Liquid on top (hooch)
The dark liquid that sometimes forms on top is alcohol, a byproduct of fermentation when the starter runs out of food. It is not harmful. Stir it back in (for more flavor) or pour it off (for milder flavor), then feed immediately. If this happens frequently, you are not feeding often enough.
Pink or orange streaks
Throw it out and start over. This indicates contamination. It is rare and usually caused by unsanitary conditions or contaminated flour. King Arthur gives the same advice for a pinkish liquid or an unpleasant odor.
Mold on top
Also throw it out. Mold means the culture is not acidic enough to suppress it, which means the starter has not properly established. Start fresh with a clean jar.
Using your starter in bread
The basic formula for a sourdough loaf:
 375gBread flouror a mix with whole wheat
 250gWaterroom temperature
 8gSalt
This gives you roughly 75% hydration at a 20% inoculation rate. The process: mix, autolyse for 30 minutes, add salt, do 3-4 sets of stretch and folds to build gluten during a 4-6 hour bulk fermentation, shape, cold-proof in the fridge overnight, and bake in a Dutch oven at 250°C (480°F) for 20 minutes covered, then 20-25 minutes uncovered.
That is a separate guide in itself, and if you have never baked a loaf before, start with the bread baking for beginners guide. But the starter is the foundation. Get it healthy and active, and the bread follows.
What to do with the discard
Each feeding produces discard, starter that would otherwise go in the trash. Do not waste it:
- Pancakes and waffles. Replace half the flour and liquid in your recipe with discard. The subtle tang works well with maple syrup.
- Crackers. Mix discard with olive oil, salt, and herbs. Roll thin, score, and bake at 175°C (350°F) for 15-20 minutes.
- Pizza dough. Add 100-200g of discard to your pizza dough recipe for added flavor. Reduce flour and water proportionally. For a dough leavened by the starter alone, follow our sourdough pizza dough guide. The pizza dough calculator can help you adjust quantities when incorporating discard.
- Flatbreads. Mix discard with salt and a drizzle of oil. Cook in a hot skillet like naan.
Discard recipes do not need the starter to be active or at its peak. Unfed, days-old discard from the fridge works fine.
The long game
A sourdough starter improves with age. At one week old, it works. At one month old, it is more predictable. At six months, the microbial population has stabilized and your bread will have a more consistent flavor profile. Some bakeries maintain starters that are decades old, not because age adds magic, but because the culture has had time to reach a deep equilibrium with its environment.
Name it if you want. Feed it regularly. Use it often. And if you go on vacation, stick it in the fridge with a generous feeding. It will be waiting for you when you get back.