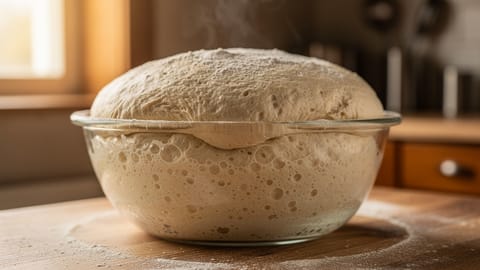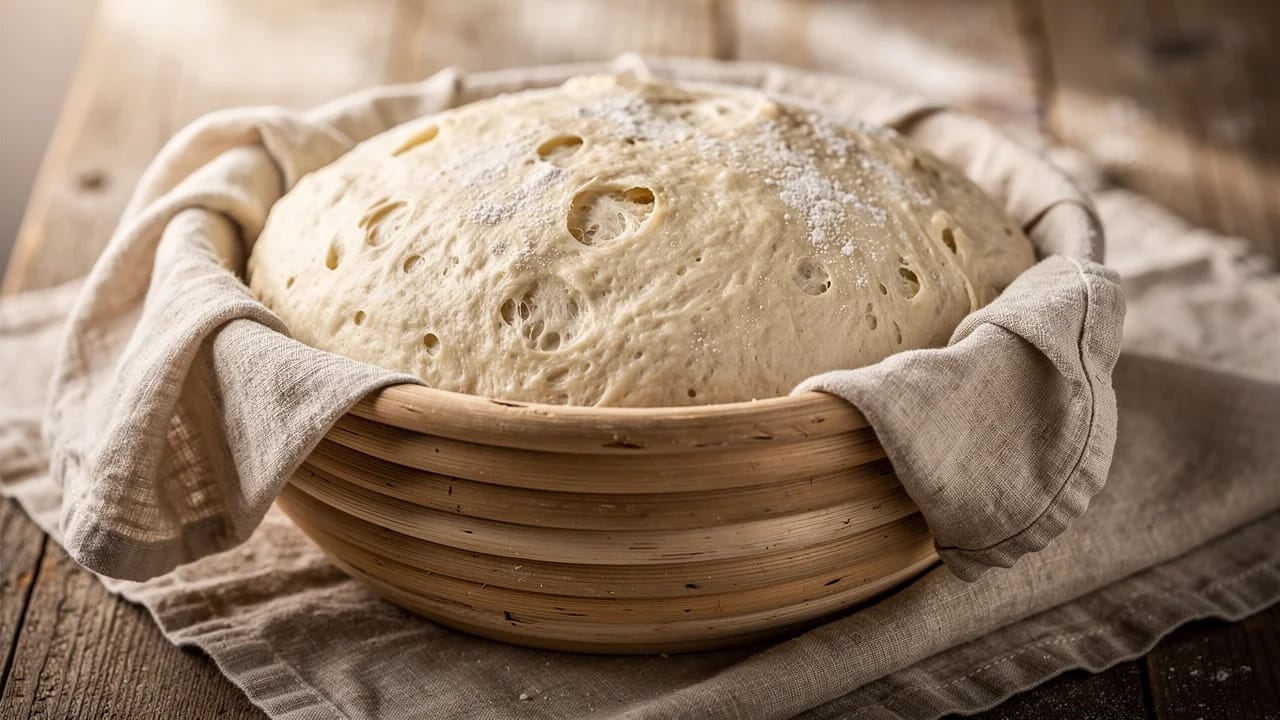
Proofing
Proofing is the final rise of bread dough after shaping (30 minutes to 16 hours), where the shaped loaf expands with carbon dioxide from yeast before baking — produces a light, airy crumb instead of a dense brick.
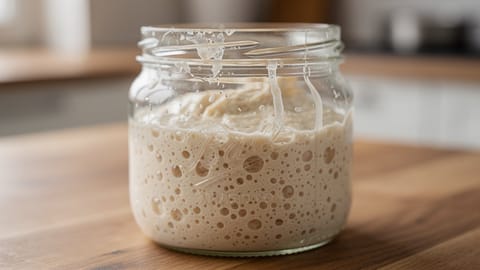
Proofing (also called the final proof, second rise, or simply "proof") is the last rise of shaped bread dough before it goes into the oven, lasting from 30 minutes at room temperature to 16 hours in the fridge. During proofing, the yeast continues to produce carbon dioxide, inflating the shaped dough ball so it bakes into a light, airy loaf instead of a dense brick.
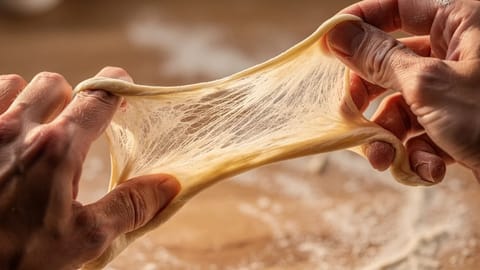
I used to rush this step. Mix, shape, bake. The result was always the same: dense bread with a thick crust and zero oven spring. It took me a good dozen loaves to realize that proofing is where the patience pays off. Everything you did during mixing, gluten development, and bulk fermentation was preparation for this moment. The dough already has flavor and structure. Now it needs to expand one last time.
What is the difference between proofing and bulk fermentation?
These two terms get mixed up constantly, so here is the difference:
Bulk fermentation builds the foundation. Proofing inflates the finished structure. You can have a perfect bulk and still ruin your bread by proofing incorrectly.
What is the ideal proofing temperature and timing?
Proofing speed depends almost entirely on temperature and the amount of yeast or sourdough starter activity in the dough:
Warmer temperatures speed things up, but there is a ceiling. Above 30°C (86°F), yeast becomes stressed, off-flavors develop, and the dough can over-proof quickly. The sweet spot for most bread is 24-27°C (75-80°F).
How to proof dough in the oven
If your kitchen is cold in winter, your oven is the best proofing box you already own. Turn on the oven light and place the dough inside the closed oven. The light alone raises the temperature to about 27-29°C (80-84°F), which is right in the ideal range for proofing bread dough.
I keep a cheap thermometer inside mine to verify. Some bakers place a pan of hot water on a lower rack to add humidity, which keeps the dough surface from drying out. Just make sure to remove the dough before preheating the oven for baking.
How does the poke test work?
The poke test is the most reliable way to check if your dough is proofed and ready for the oven. Lightly flour your fingertip and press about 1 cm into the surface of the dough:
The poke test works because it measures the tension in the gluten network. Early in proofing, the gluten is tight and elastic. As fermentation continues, the gluten relaxes and stretches. At peak proof, it has just enough tension to spring back partially. Past that point, the gluten has stretched too thin and starts to break down.
After a few loaves, you'll develop a feel for the right amount of spring-back. I still do the poke test on every single bake.
How can you tell if dough is over- or under-proofed?
Getting the proof right is one of the harder skills in bread baking. Here is what happens at each extreme:
Signs of under-proofed dough
- The shaped dough looks tight and hasn't grown much
- Poke test: springs back fast and fully
- After baking: dense, tight crumb with uneven holes
- The loaf may burst open along the sides or bottom (a blowout) because trapped gas expands too aggressively in the oven
- Thick, chewy crust
Signs of over-proofed dough
- The dough looks puffy and fragile, may be starting to sag
- Poke test: the indent stays and the surface wrinkles
- After baking: flat loaf with poor oven spring
- Pale crust (the yeast consumed too much sugar)
- Gummy or collapsed crumb structure
- Sour or alcoholic smell (especially with sourdough)
Under-proofing is easier to recover from. If your dough is slightly under-proofed, the residual yeast activity during the first minutes of baking (called oven spring) can partially compensate. Over-proofed dough has no gas production left to give.
If you suspect your dough is over-proofed but hasn't completely collapsed, you can try gently reshaping it and giving it a shorter second proof. This doesn't always work, but it's better than baking a pancake.
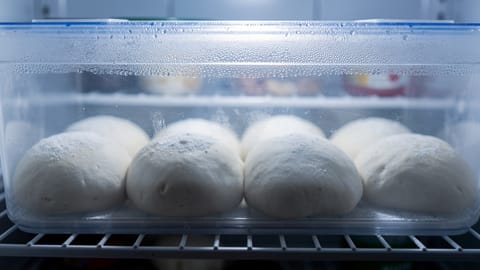
What is cold proofing (retarding)?
Cold proofing means placing the shaped dough in the fridge at 3-5°C (38-41°F) for an extended proof, typically 8-16 hours overnight. I switched to cold proofing for all my sourdough about a year ago, and the difference in flavor and crust color is hard to overstate.
- Better flavor: slow bacterial activity develops complex lactic tang without over-fermenting
- Schedule flexibility: shape in the evening, bake in the morning
- Cleaner scoring: cold dough is firmer and holds its shape, producing sharper ears
- Deeper crust color: changed sugar profile leads to better Maillard browning
Cold fermentation at fridge temperatures slows yeast activity dramatically, but bacterial activity continues at a reduced rate. The result is bread that tastes noticeably better than a room-temperature proof.
For cold proofing, place the shaped dough in a banneton or on a tray, cover it tightly with plastic wrap or a shower cap, and put it straight into the fridge. Most sourdough bakers bake directly from the fridge without warming up first. The cold dough goes right into a preheated Dutch oven.
Tip: Do you cover dough when proofing in the fridge? Always. Uncovered dough develops a dry skin that restricts expansion and causes uneven rising. Plastic wrap, a shower cap, or a damp towel all work. I use shower caps because they're reusable and fit snugly over bannetons.
How does proofing differ across dough types?
Lean bread (sourdough, country loaf, baguettes)
Lean doughs proof faster at room temperature because nothing slows the yeast down. Proof at 22-26°C (72-78°F) for 1-4 hours, or cold-proof overnight. Aim for 50-75% volume increase. Lean doughs are less forgiving of over-proofing because the gluten network has no fat to help it stay flexible.
Enriched dough (brioche, challah, cinnamon rolls)
Fat, sugar, and eggs slow down fermentation significantly. Butter coats gluten strands and yeast cells, reducing gas production. These doughs need warmer temperatures (26-29°C / 78-84°F) and longer proof times (1-2 hours or more). They're more forgiving of slight over-proofing because the fat keeps the crumb tender even if structure weakens.
Pizza dough
Pizza dough balls are typically proofed at room temperature for several hours after cold fermentation. The goal is a soft, extensible dough that stretches easily without snapping back. A well-proofed pizza dough feels pillowy and full of air when you press it. The pizza dough calculator provides proofing schedules tailored to each pizza style and your kitchen temperature.
Sandwich and pan bread
Proof in the loaf pan until the dough rises about 2-3 cm above the rim. This usually takes 60-90 minutes at room temperature. Pan breads are easier to judge because you have the rim as a reference point.
What containers and tools are used for proofing?
- Banneton (proofing basket): a rattan or wood-pulp basket that supports round or oval loaves during proofing and creates flour rings on the crust. Dust generously with rice flour to prevent sticking.
- Couche (linen cloth): used for baguettes and batards. The folds of the cloth support the dough on both sides, preventing it from spreading flat.
- Proofing box: a temperature-controlled enclosure. Great if you bake often, but the oven-light trick works for most home bakers.
- Plastic wrap or damp towel: cover the dough during proofing to prevent a dry skin from forming. A skin on the surface restricts expansion and causes splitting.
What are the most common proofing problems?
Over-proofed, or weak shaping. Shorten proof time and practice tighter shaping with more surface tension. The gluten window test before shaping can tell you if gluten development is sufficient.
Not covered, or dry environment. Cover with plastic wrap or a damp cloth. If proofing in the oven, add a pan of hot water for humidity.
Not enough flour, or wet dough surface. Use rice flour instead of wheat flour. Rice flour doesn't absorb moisture the same way, so it creates a non-stick barrier.
Under-proofed dough. The trapped gas expands too aggressively in the oven because the gluten network is still too tight. Extend proof time until the poke test shows a slow spring-back.
Over-proofed. The gluten has stretched too thin and can't hold any more gas. Reduce proof time or lower the proofing temperature.
Uneven shaping or a drafty spot. Shape more evenly and proof away from drafts, windows, or air vents.
How long should you proof dough?
There's no single answer because proofing time depends on temperature, hydration, yeast quantity, and flour type. But here are the ranges I rely on:
- Quick proof (45-90 min): Standard commercial yeast dough at 24-27°C. Good for weeknight bread.
- Medium proof (2-4 hours): Sourdough at room temperature, or enriched dough. Watch the dough, not the clock.
- Cold proof (8-16 hours): Shaped dough in the fridge overnight. The most forgiving method because the cold temperature gives you a wide window.
Use the baker's percentage of yeast to estimate: more yeast means faster proofing. A dough with 2% fresh yeast at 25°C will proof in about an hour. The same dough with 0.5% yeast at the same temperature might need 3-4 hours.
A kitchen scale helps you nail the yeast amount consistently, which makes proofing times more predictable from bake to bake.
Proofing in Fond
Fond's Bread Studio includes a proofing timer that adjusts based on your dough type, kitchen temperature, and whether you're doing a room-temperature or cold proof. The app sends a notification when your dough is approaching the end of its proof window, so you can perform the poke test and decide when to fire up the oven. For recipes that benefit from overnight cold proofing, the schedule view shows exactly when to shape, refrigerate, and bake.