How to braise meat: the complete guide to low and slow cooking
Everything you need to braise meat at home. Covers the best cuts for braising, step-by-step technique, braising liquids, equipment, and global traditions from French daube to Korean galbi-jjim — with times, temperatures, and troubleshooting.
Braising is how you turn the cheapest, toughest cuts of meat into the best thing on the table. A beef chuck roast that would be miserable grilled becomes fork-tender and deeply flavorful after a few hours in a covered pot with some liquid. The technique is dead simple: sear, add liquid, cover, cook low and slow. That is the entire method. The rest is details, and those details are what this guide covers.
Braising time chart: 14 cuts at a glance
The complete cross-cut reference. Every braise-friendly cut, the typical weight, oven time at 150°C / 300°F, recommended liquid, and what it's best for. Use this to match a cut to a dinner plan, or to know roughly how much oven time a cut needs before you commit.
| Cut | Animal | Weight | Braising time @ 150°C/300°F | Best liquid | Best for |
|---|---|---|---|---|---|
| Chuck roast | Beef | 1.3-2.2 kg (3-5 lb) | 3-4 hours | Red wine + beef stock | Pot roast, beef stew |
| Short ribs | Beef | 1-1.8 kg (2-4 lb) | 2.5-3.5 hours | Red wine + stock | Wine-braised ribs, galbi-jjim |
| Brisket | Beef | 1.8-3.6 kg (4-8 lb) | 3.5-5 hours | Stock + tomato | Jewish brisket, barbacoa |
| Oxtail | Beef | 0.9-1.4 kg (2-3 lb) | 3-4 hours | Red wine + stock | Oxtail stew, ragu |
| Beef shanks | Beef | 0.7-1 kg (1.5-2 lb) | 2.5-3.5 hours | White wine + stock | Osso buco style |
| Pork shoulder (butt) | Pork | 1.8-3.6 kg (4-8 lb) | 3-5 hours | Beer or stock | Pulled pork, carnitas, ragu |
| Pork shanks (hocks) | Pork | 0.5-0.7 kg (1-1.5 lb) each | 2.5-3 hours | Stock or beer | Schweinshaxe, bean soups |
| Pork belly | Pork | 0.9-1.4 kg (2-3 lb) | 2-3 hours | Soy + Shaoxing wine | Red-braised pork, kakuni |
| Lamb shanks | Lamb | 0.3-0.5 kg (0.7-1 lb) each | 2-3 hours | Red wine + stock | Classic braised shanks |
| Lamb shoulder | Lamb | 1.4-2.3 kg (3-5 lb) | 3-4 hours | Stock + spices | Tagine, kleftiko |
| Veal shanks | Veal | 0.4-0.5 kg per slice | 2-2.5 hours | White wine + stock + tomato | Osso buco alla milanese |
| Chicken thighs (bone-in) | Poultry | 0.2 kg each | 45-90 minutes | White wine + stock | Coq au vin, braised thighs |
| Chicken legs | Poultry | 0.3 kg each | 60-90 minutes | White wine + stock | Quick weeknight braise |
| Beef cheeks | Beef | 0.5-0.7 kg each | 3-3.5 hours | Red wine + stock | Restaurant-style braise |
Why braising works: the science
Tough cuts are tough because they contain a lot of collagen, the structural protein in connective tissue. Collagen is chewy and unpleasant when cooked quickly. But hold it at temperatures between 71-85°C (160-185°F) for long enough and the collagen breaks down into gelatin. Gelatin is silky, rich, and gives braised dishes that distinctive body you cannot get any other way.
This is why braising demands tough, well-worked muscles rather than tender, expensive cuts. A beef tenderloin has almost no collagen. Braise it and you get dry, stringy meat with nothing to show for the effort. A chuck roast is riddled with connective tissue that melts into gelatin over hours, basting the meat fibers from the inside out.
The liquid matters too. A moist cooking environment keeps the surface temperature lower than dry-heat methods like roasting, which means the meat loses less moisture overall. The covered pot traps steam, creating a self-basting cycle. And the braising liquid itself picks up all the gelatin, rendered fat, and fond from the sear. It becomes the sauce.
Temperature control is the other critical factor. Too high and the meat fibers contract violently, squeezing out moisture faster than the collagen can convert. The sweet spot is 150°C (300°F) oven temperature, which keeps the liquid at a bare simmer. Bubbles lazily breaking the surface every few seconds, not a rolling boil.
Best cuts for braising
Not every cut braises well. You want muscles that did a lot of work during the animal's life, which means more connective tissue and more flavor. Here is what to look for when choosing the best meat to braise.
Beef
| Cut | Weight range | Braising time | Best for |
|---|---|---|---|
| Chuck roast | 1.3-2.2 kg (3-5 lb) | 3-4 hours | Classic pot roast, beef stew |
| Short ribs | 1-1.8 kg (2-4 lb) | 2.5-3.5 hours | Wine-braised short ribs, Korean galbi-jjim |
| Brisket | 1.8-3.6 kg (4-8 lb) | 3.5-5 hours | Jewish-style brisket, barbacoa |
| Oxtail | 0.9-1.4 kg (2-3 lb) | 3-4 hours | Oxtail stew, ragu |
| Beef shanks | 0.7-1 kg (1.5-2 lb) | 2.5-3.5 hours | Osso buco style |
Chuck roast is the workhorse of braising. It sits on the shoulder, a heavily worked muscle group loaded with intramuscular fat and collagen. It is cheap, widely available, and almost impossible to mess up if you give it enough time. I've braised dozens of chuck roasts over the years, and the only time one came out poorly was when I rushed it at too high a temperature.
Short ribs are the luxury option. They have a rich, beefy flavor and render down to a texture that barely holds together on the plate. Bone-in short ribs are worth seeking out. The bones add body to the sauce.
Pork
| Cut | Weight range | Braising time | Best for |
|---|---|---|---|
| Shoulder (butt) | 1.8-3.6 kg (4-8 lb) | 3-5 hours | Pulled pork, carnitas, ragu |
| Shanks (hocks) | 0.5-0.7 kg (1-1.5 lb) each | 2.5-3 hours | German schweinshaxe, bean soups |
| Belly | 0.9-1.4 kg (2-3 lb) | 2-3 hours | Red-braised pork belly, kakuni |
Pork shoulder is arguably the most forgiving cut to braise. The fat marbling is generous, so even if you overshoot the time slightly, it stays moist. It shreds beautifully for tacos, sandwiches, and ragu.
Lamb
| Cut | Weight range | Braising time | Best for |
|---|---|---|---|
| Shanks | 0.3-0.5 kg (0.7-1 lb) each | 2-3 hours | Classic braised lamb shanks |
| Shoulder | 1.4-2.3 kg (3-5 lb) | 3-4 hours | Moroccan tagine, Greek kleftiko |
Lamb shanks are one of the most dramatic braised dishes you can make. The meat pulls cleanly off the bone and the sauce has a richness that pairs with red wine or warm spices.
Poultry
Chicken thighs and legs braise well in 45-90 minutes. They are the quick braise option. Still enough collagen to get that silky sauce, but done in a fraction of the time. Avoid braising chicken breasts; they dry out.
Step-by-step braising process
1. Pat dry and season generously
Pull the meat from the fridge 30-45 minutes before cooking to take the chill off. Pat it very dry with paper towels. Surface moisture is the enemy of a good sear. Season liberally with salt and pepper on all sides. For larger roasts, season the night before and refrigerate uncovered; the salt penetrates deeper and the surface dries out, which improves browning.
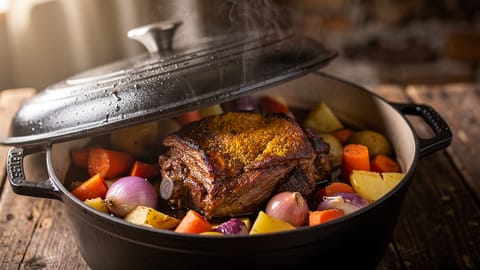
2. Sear to build fond
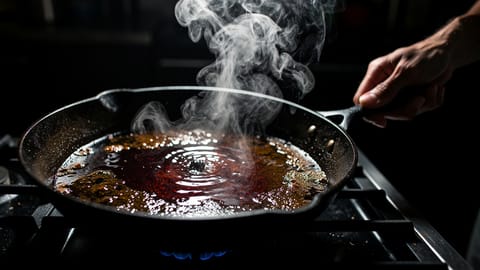
Heat a thin layer of high-smoke-point oil (vegetable, grapeseed, or avocado) in your Dutch oven over medium-high heat until it shimmers. Add the meat without crowding the pot. Work in batches if needed. Sear until a deep brown crust forms on each side, about 3-4 minutes per side.
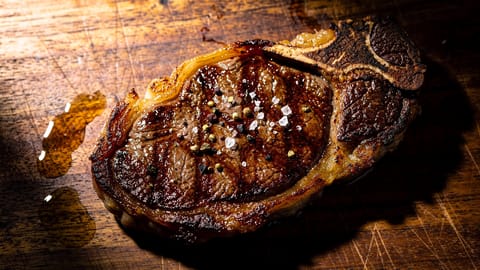
You are not cooking the meat through. You are triggering the Maillard reaction, which creates hundreds of flavor compounds that will infuse the entire dish. The brown bits stuck to the bottom of the pot are fond, and they are liquid gold for your sauce. Do not scrape them off yet.
3. Build the aromatic base
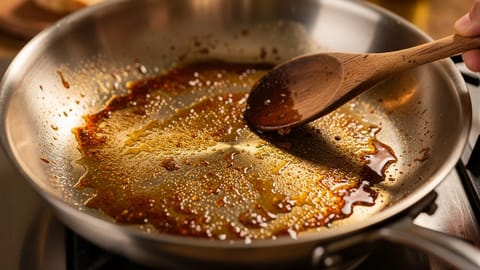
Remove the seared meat and set it aside. Reduce the heat to medium. Add diced onion, carrot, and celery (a classic mirepoix) to the pot. Cook, stirring occasionally, until softened and starting to color, about 5-7 minutes. Add garlic in the last minute; it burns quickly. You can add tomato paste here too. Let it cook for a minute or two until it darkens slightly.
4. Deglaze the pot
This is where you dissolve all that fond into your sauce. Pour in your deglazing liquid (wine, stock, or beer) and scrape the bottom of the pot with a wooden spoon. Let the liquid simmer for 2-3 minutes to cook off the raw alcohol if using wine or beer.
5. Add braising liquid and the meat
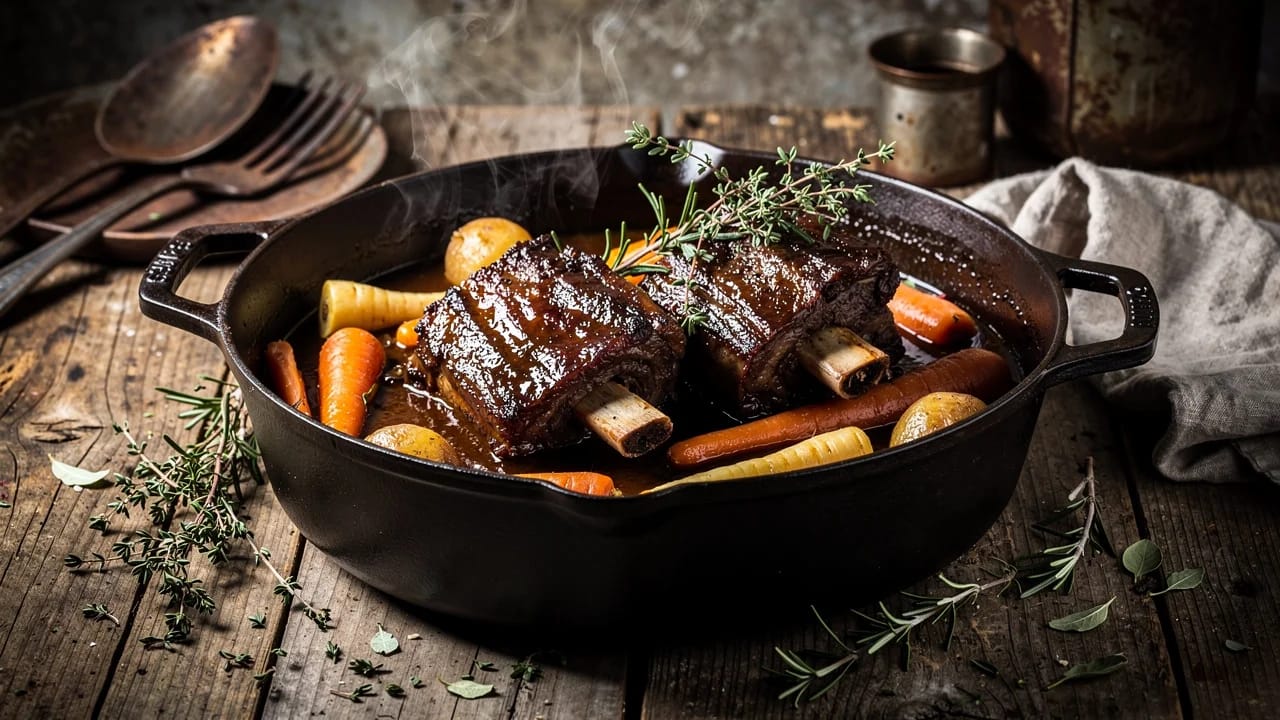
Pour in enough braising liquid to come halfway up the sides of the meat. Not submerged, halfway. If the meat is fully underwater, you are making stew, not braising. The top of the meat should poke above the liquid, where it can develop a slightly different texture from the portion below the surface.
Nestle the meat back into the pot. Add any herbs: thyme, rosemary, and bay leaves are the classics. A strip of orange zest works well with beef and lamb.
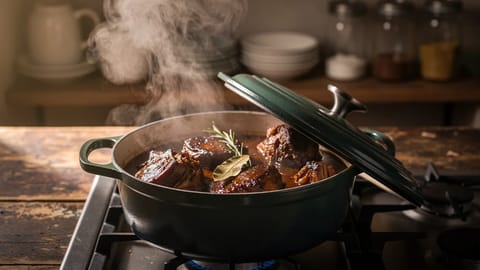
6. Cover and cook low and slow
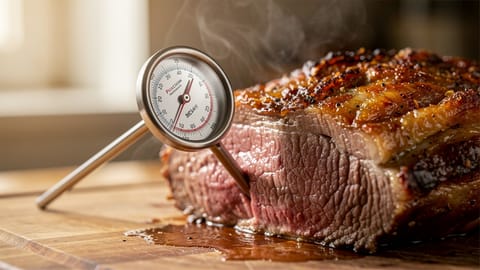
This is how to braise meat in the oven: put the lid on and transfer to a 150°C (300°F) oven. The oven heats more evenly than the stovetop, reducing hot spots that can scorch the bottom. Cook until the meat is fork-tender, meaning a fork slides in and out with almost no resistance.
How long to braise beef depends on the cut:
- Chicken thighs/legs: 45-90 minutes
- Lamb shanks: 2-3 hours
- Short ribs: 2.5-3.5 hours
- Chuck roast: 3-4 hours
- Pork shoulder: 3-5 hours
- Brisket: 3.5-5 hours
Check once per hour. The liquid should barely simmer. Gentle bubbles, not a vigorous boil. If it is boiling, drop the oven by 10°C (25°F).
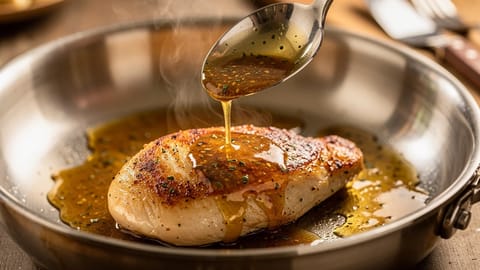
7. Rest and finish the sauce
Remove the meat and tent it loosely with foil. Strain the braising liquid if you want a smooth sauce, or leave the vegetables in for a rustic approach. Skim the fat off the surface. A fat separator makes this easier, or chill the liquid and lift off the solidified fat the next day.
If the sauce is thin, bring it to a boil on the stovetop and reduce it until it coats the back of a spoon. Taste for seasoning. The carryover cooking while the meat rests lets the fibers relax and reabsorb some moisture, so do not skip this step.
How to braise meat on the stove
You can braise entirely on the stovetop if you prefer or don't have an oven available. The method is the same through step 5. Instead of transferring to the oven, keep the pot on the smallest burner at the lowest setting. Use a flame diffuser if you have one. The challenge with stovetop braising is uneven heat: the bottom of the pot gets much hotter than the sides, which can scorch the liquid and toughen the meat closest to the heat source.
I've done plenty of stovetop braises when my oven was occupied, and the key is checking more often. Flip the meat halfway through and rotate the pot occasionally. If you notice the liquid is at a rolling boil even on the lowest setting, crack the lid slightly to release steam. The oven is more forgiving, but stovetop braises still produce good results with a bit more attention.
Choosing your braising liquid
The liquid does more than keep things moist. It becomes your sauce. Choose based on the flavor profile you want.
| Liquid | Flavor profile | Best with | Notes |
|---|---|---|---|
| Beef stock | Rich, savory, neutral | Beef, lamb | The safe default. Homemade is noticeably better. |
| Red wine | Deep, tannic, fruity | Beef short ribs, lamb shanks, oxtail | Use something you would drink. Cook out the alcohol for 2-3 min. |
| White wine | Bright, acidic | Chicken, pork, lighter braises | Dry whites work best. Avoid anything too sweet. |
| Beer | Malty, slightly bitter | Pork shoulder, beef chuck | Dark lagers and stouts for beef, lighter ales for pork. |
| Crushed tomatoes | Acidic, sweet, robust | Italian-style braises, short ribs | Adds body and color. Can be combined with stock or wine. |
| Coconut milk | Creamy, sweet, mild | Southeast Asian-style braises | Pairs well with lemongrass, galangal, and lime leaves. |
Most great braises use a combination. A classic formula: deglaze with wine, then add stock to reach the halfway mark. Tomato paste adds depth without making it a tomato dish.
Equipment
Dutch oven
A heavy, enameled cast-iron Dutch oven is the single best piece of braising equipment you can own. It sears on the stovetop, goes straight into the oven, retains heat evenly, and the tight-fitting lid traps moisture. A 5.5-quart (5.2L) Dutch oven handles most braises for 4-6 people. Le Creuset and Staub are the gold standard, but Lodge makes an excellent enameled option at a third of the price.
How to braise meat without a Dutch oven
You don't need a Dutch oven to braise. Any oven-safe pot with a tight lid works: a stainless steel stockpot, a ceramic casserole dish with a lid, or even a deep roasting pan sealed tightly with aluminum foil. The two things that matter are heat retention and a good seal to trap steam. I've braised short ribs in a basic stainless pot wrapped with foil, and they came out just as tender as any Dutch oven batch.
Braiser pan
A braiser (also called a braisiere) is wider and shallower than a Dutch oven. It gives you more surface area for searing, which is helpful for flat cuts or multiple pieces. The tradeoff is less depth for the braising liquid.
Slow cooker
A slow cooker works for braising meat, but you lose the searing step unless you do it in a separate pan (which means more cleanup and less fond transfer). Set it to low for roughly the same time as oven braising. The results are good, not great. The even heat of an oven produces a better sauce.
Instant Pot / pressure cooker
Pressure cooking cuts braising time by 60-70%. Beef short ribs that take 3 hours in the oven finish in about 45-60 minutes under pressure. The tradeoff is less Maillard reaction development and a sauce that sometimes needs reducing after cooking. Use the saute function to sear first.
Global braising traditions
Braising shows up in nearly every food culture. The technique is universal because it solves a universal problem: making tough, inexpensive meat delicious.
French daube -- Beef braised in red wine with orange peel, olives, and herbes de Provence. Often made with bull or older cow meat. Traditionally cooked in a daubiere, a narrow-mouthed clay pot designed to minimize evaporation.
Italian osso buco -- Veal shanks braised with white wine, tomatoes, and mirepoix, finished with gremolata (lemon zest, garlic, parsley). Milanese tradition serves it with saffron risotto.
Korean galbi-jjim -- Beef short ribs braised with soy sauce, sugar, sesame oil, garlic, and Asian pear. The pear tenderizes the meat and adds a subtle sweetness. Traditionally a holiday and celebration dish.
Mexican barbacoa -- Beef cheeks or head meat braised with dried chiles, cumin, oregano, and cloves. The original version is pit-cooked wrapped in maguey leaves, but the home version braises in a Dutch oven with a similar spice profile.
Moroccan tagine -- Lamb shoulder braised with onions, preserved lemons, olives, saffron, and warm spices in a cone-lidded clay pot. The conical lid channels steam back into the dish, and the low, slow heat produces tender meat with a fragrant sauce.
Chinese red braising (hong shao) -- Pork belly or spare ribs braised in soy sauce, Shaoxing wine, sugar, star anise, and cinnamon. The soy and sugar create a lacquered, mahogany glaze. Hong shao rou (red-braised pork belly) is one of the great comfort dishes.
German sauerbraten -- Beef roast marinated for 3-7 days in vinegar and spices before braising. The long marination tenderizes and infuses a tangy depth. Traditionally served with red cabbage and potato dumplings.
Troubleshooting common problems
Keep cooking. Braising is not done by the clock. It is done when the meat yields to a fork. Some cuts take longer depending on the specific animal, age, and how much collagen is present. Check every 30 minutes and add a splash of stock if the liquid level has dropped.
Remove the meat and boil the liquid uncovered until it reaches the consistency you want. You can also whisk in a slurry of 1 tablespoon cornstarch mixed with 2 tablespoons cold water and simmer for a minute. Or strain the liquid and reduce it in a wide pan for faster evaporation.
Your heat was too high or the pot was empty too long between batches. Next time, reduce the heat to medium and work faster. If the fond is black (not dark brown), pour it out, wipe the pot, and start the aromatic base with fresh oil. Burnt fond makes the entire dish bitter.
Two likely causes: the liquid evaporated because the lid was not tight enough, or the oven temperature was too high. A tight lid is critical. If your lid does not seal well, lay a sheet of parchment paper over the pot before putting the lid on. Double-check your oven temperature with a thermometer. Many ovens run hot.
Acid is probably missing. Add a splash of wine vinegar, lemon juice, or even a small amount of soy sauce. Season again with salt. Braising liquids often need more salt than you think once they have reduced.
Braising vegetables
Braising is not only for meat. Hardy vegetables respond beautifully to the same low-and-slow approach.
Cabbage -- Quarter a head of cabbage, sear the cut sides, then braise in stock with caraway seeds and a splash of vinegar for 45-60 minutes.
Fennel -- Halve fennel bulbs and braise in white wine and stock with a squeeze of lemon. About 40-50 minutes until meltingly soft.
Leeks -- Trim and halve leeks lengthwise. Braise in stock with butter, thyme, and a touch of cream for 30-40 minutes.
Endive -- Belgian endive braised in butter, sugar, and lemon juice until caramelized and tender, about 30 minutes. A classic French side dish.
Root vegetables -- Carrots, parsnips, and turnips can all be braised in stock with herbs. They take 30-50 minutes depending on size.
The technique is the same: sear or brown for flavor, add liquid halfway up, cover, and cook at low heat until tender. Vegetables braise faster than meat since there is no collagen conversion to wait for. You are just softening the cell structure and concentrating flavor.
Make it ahead
Braised dishes are almost always better the next day. The flavors meld, the sauce sets up with gelatin, and reheating gently lets everything come together in a way that freshly cooked braises have not yet achieved. Cool the braise completely, refrigerate, then lift off the solidified fat cap before reheating. Warm it gently, covered, in a 150°C (300°F) oven for 30-40 minutes, or on the stovetop over low heat. After testing both approaches side by side, I now always braise a day ahead when I'm cooking for guests. The difference in depth of flavor is noticeable. This make-ahead quality makes braising one of the best techniques for meal prep and entertaining.
- Braising turns tough, collagen-rich cuts into fork-tender meat through low, slow heat
- The best cuts for braising are chuck roast, short ribs, pork shoulder, and lamb shanks
- Keep the liquid at halfway up the meat and the oven at 150°C (300°F)
- Always sear first to build fond, which becomes the foundation of your sauce
- Braise in the oven for even heat, or on the stovetop with more frequent checks
- Make it a day ahead for the best results