Sourdough Pizza Dough
Make pizza with your sourdough starter for a crust with real complexity: mild tang, open crumb, and excellent browning. Plan for 8-72 hours of fermentation depending on your schedule.
TL;DR: Sourdough pizza dough takes longer than commercial yeast but rewards you with complex flavor, better texture, and a crust that browns beautifully. Use 20-30% starter at peak activity, target a dough temperature of 75-78°F (24-26°C), and give it a cold ferment of 24-72 hours for best results.
Sourdough pizza dough operates on different logic than commercial yeast doughs. The fermentation timeline is longer, the dough behaves differently, and the variables that matter most are not always the obvious ones. This guide covers the full process from starter assessment through baking, including what goes wrong and how to fix it.
Why sourdough pizza dough is worth the wait
Flavor is the most obvious benefit. Wild fermentation produces acetic acid, lactic acid, and dozens of aromatic compounds that don't develop in a 2-hour commercial yeast dough. The result is a crust with background complexity, a mild tang, and a fermented depth that makes plain sourdough pizza memorable.
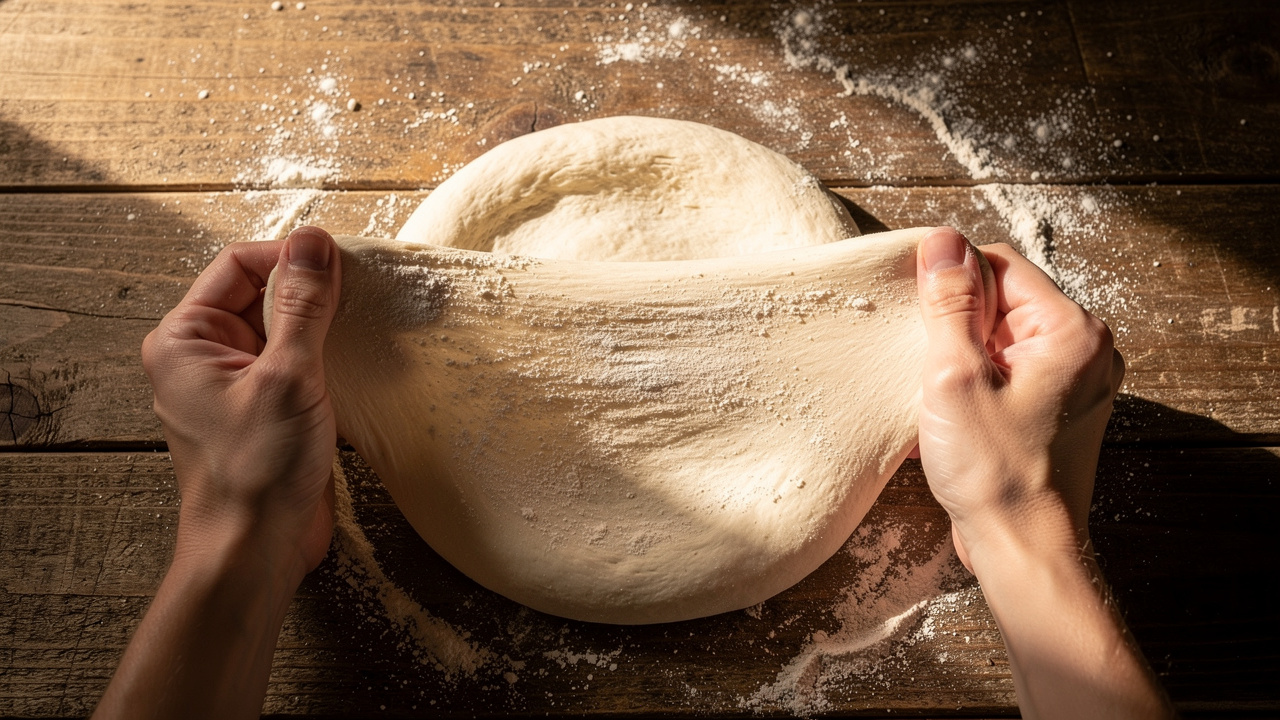
Texture is where sourdough genuinely excels. Long fermentation breaks down gluten chains through enzymatic activity, relaxing the dough and making it more extensible. Naturally leavened doughs stretch thin without tearing more easily, and the crumb structure after baking is open and irregular rather than uniform. This is gluten development working in your favor over time.
Browning is often cited as a sourdough advantage, and it is real, but the reason is frequently misunderstood. Sourdough pizza crust browns well due to Maillard reactions involving specific amino acids produced during fermentation, combined with the slightly acidic environment. This is not simply a matter of "higher free sugar content." After a long cold ferment, much of the available sugar has already been consumed by the yeast and bacteria. The browning comes primarily from the acidic pH and the amino acid profile of the dough, not from residual sugar.
Digestibility is a genuine, if often overstated, benefit. Long fermentation pre-digests some of the starches and partially breaks down phytic acid, which can make the finished pizza easier to digest for some people. A 2019 study published in Frontiers in Microbiology found that sourdough fermentation significantly reduced FODMAP content in wheat-based doughs.
Naturally leavened pizza: a brief history
Naturally leavened pizza traditions predate commercial yeast, which only became widely available in the mid-19th century. Neapolitan pizza in its earliest forms used wild starters maintained by pizzaiolos across generations. The shift to commercial yeast was driven by convenience and consistency, not improvement. Many traditional Neapolitan pizzerias never made that shift.
Understanding your sourdough starter
The single biggest variable in sourdough pizza is starter health and timing. A sluggish or poorly timed starter produces flat, dense dough that can't compete with the simplicity of commercial yeast.
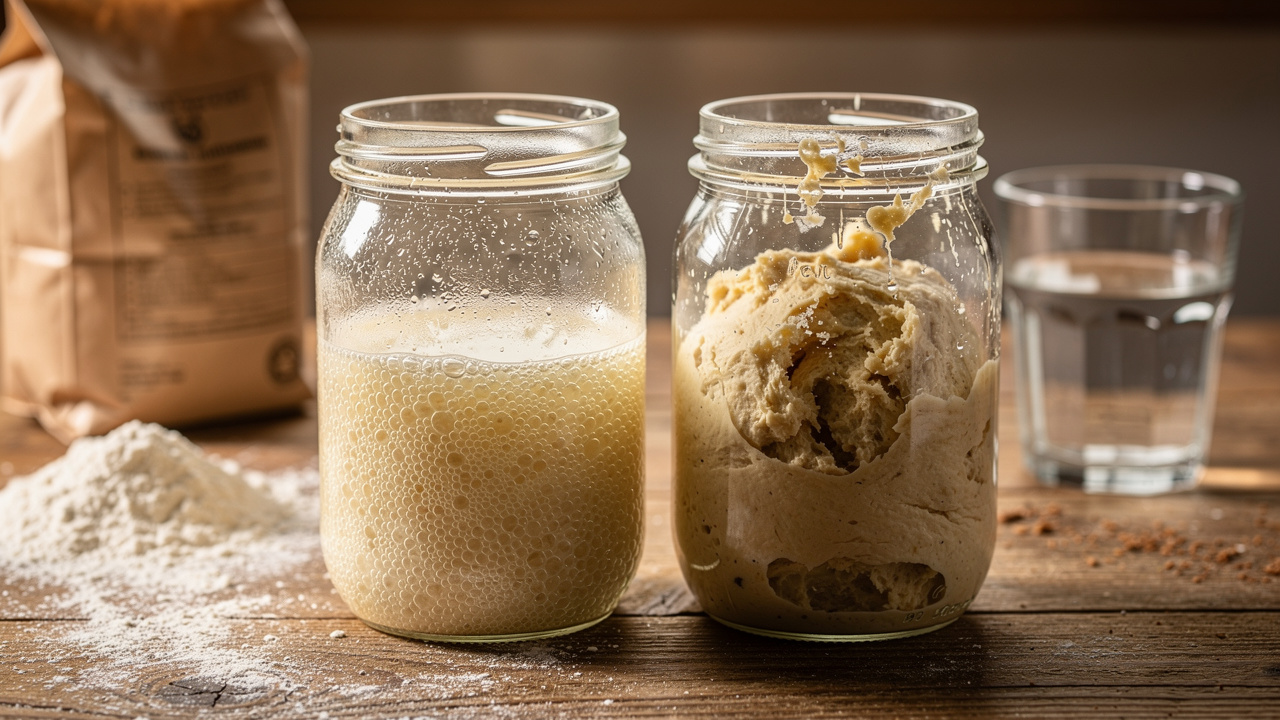
What "peak activity" actually means
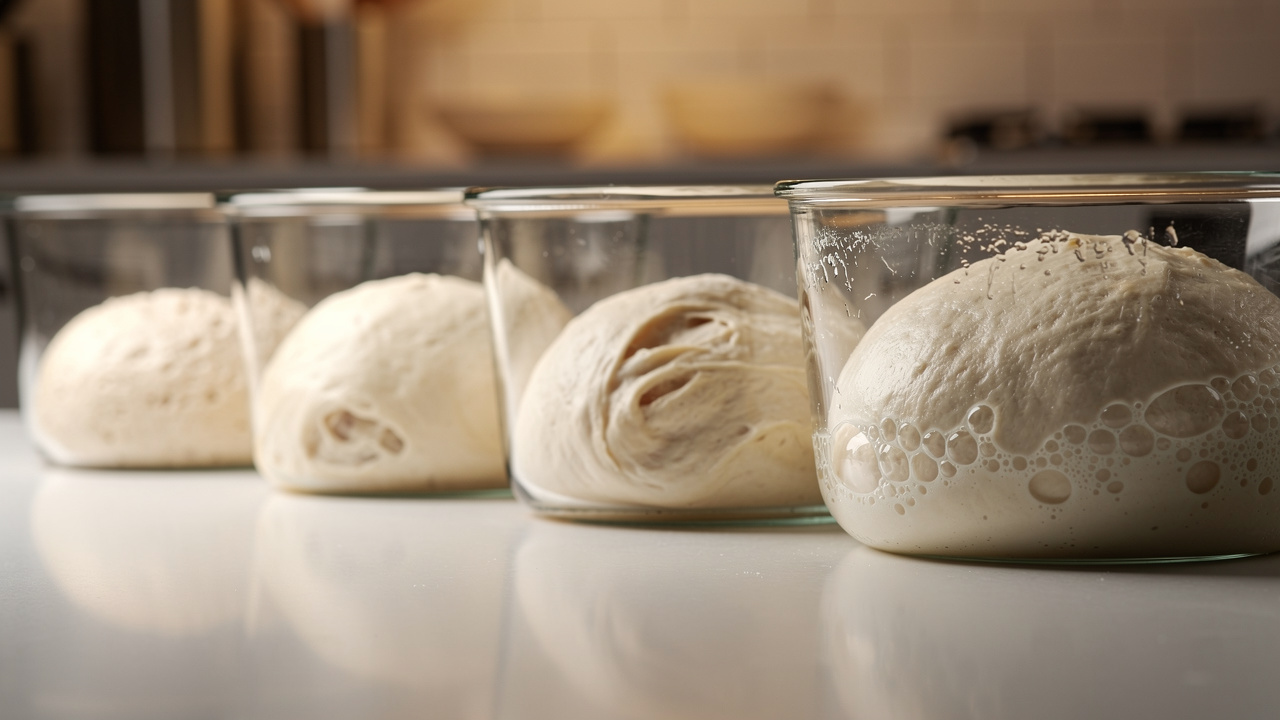
Peak activity is the moment when your starter has consumed most of its available food and reaches maximum CO2 production before it begins to deflate. At peak, the starter:
- Has a domed top (flat or concave means it's past peak)
- Shows bubbles on the surface and sides
- Jiggles like a loose custard when you shake the jar
- Has roughly doubled from its post-feed size (ratio and flour dependent)
- Smells yeasty and mildly tangy, not acetone-sharp or alcoholic
The float test is unreliable. It tests gas content at the moment of testing, which varies with hydration, temperature, and starter health in ways that don't correlate cleanly with leavening power. Ignore it. Use the visual cues above and timing from your last feed.
Tip: Keep a rubber band on your jar after feeding to track rise. Add your starter to dough when it's at the dome peak or just before it flattens.
Timing from your last feed is the most practical guide. At 75°F (24°C) with a 1:2:2 feeding ratio (starter:flour:water), most active starters hit peak around 6-8 hours. Learn your specific starter's rhythm.
Starter ratios and timing
A higher ratio of starter to fresh flour speeds fermentation; a lower ratio slows it down. For pizza dough specifically:
| Feeding Ratio | Time to Peak at 75°F |
|---|---|
| 1:1:1 | 4-6 hours |
| 1:2:2 | 6-8 hours |
| 1:3:3 | 8-12 hours |
| 1:5:5 | 12-16 hours |
If you want to bake in the evening, feed at a ratio that puts peak activity at the time you plan to mix. Adjust water temperature to control dough temperature after mixing (see the mixing section).
Starter hydration for pizza
For pizza dough, a 100% hydration starter (equal weights flour and water) is the standard and simplest to manage. Stiff starters (50-70% hydration) produce more acetic acid and are sometimes preferred for cold-fermented Neapolitan doughs where more tang is desired, but they require more involved maintenance and aren't necessary for excellent results at home.
The sourdough pizza dough formula
The formula below works for 4 individual Neapolitan-style pizzas (about 270g dough balls each). Use our pizza dough calculator to adjust quantities for any number of pizzas.
Baker's percentages
| Ingredient | Weight | Baker's % |
|---|---|---|
| Flour | 700g | 100% |
| Water | 420g | 60% |
| Starter | 175g | 25% |
| Salt | 14g | 2% |
| Total | 1309g |
Note: This is 60% hydration based on total flour, but the starter itself contains flour and water. Factoring the starter's flour into the total gives an effective hydration of approximately 63.6%, which is lower-medium for sourdough pizza. See the hydration section below for how to adjust.
Starter percentage and its effect
The percentage of starter (relative to flour) controls fermentation speed significantly.
| Starter % | Fermentation Speed | Best For |
|---|---|---|
| 10-15% | Slow | 48-72h cold ferment |
| 20-25% | Medium | 24-48h cold ferment |
| 30-35% | Fast | Same-day or quick overnight |
| 40%+ | Very fast | Same-day, less complex flavor |
Lower starter percentages give wild yeast and bacteria more time to produce complex flavor compounds before the dough overproofs. Higher percentages are useful when you need results faster.
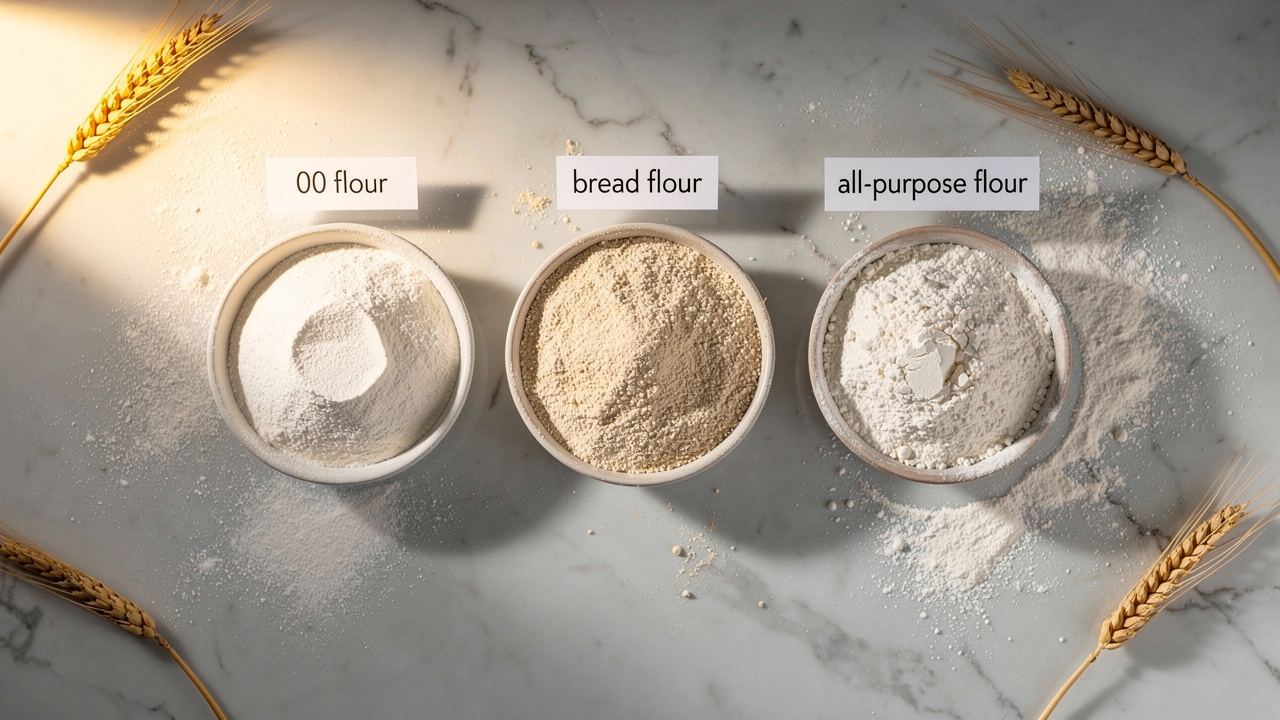
Flour selection
The choice between Tipo 00 and bread flour meaningfully changes the character of your crust.
| Tipo 00 | Bread Flour | |
|---|---|---|
| Protein | 11-12% | 12-14% |
| Granulation | Very fine | Coarser |
| Water absorption | Lower | Higher |
| Extensibility | High | Moderate |
| Gluten strength | Moderate | Strong |
| Best for | Neapolitan, thin crust | New York, thicker, higher hydration |
| Browning | Even, quick | Slightly slower |
Tipo 00's fine granulation hydrates more uniformly and produces a silkier, more extensible dough, which is why it's preferred for Neapolitan-style work. It also browns faster at high heat, making it well-suited to wood-fired and pizza steel baking.
Bread flour absorbs more water and builds a stronger gluten network, which holds up better at higher hydrations and makes the dough more forgiving if you're not yet comfortable with very extensible Tipo 00 dough.
For a full breakdown of flour options, including W-ratings and Italian import vs. domestic alternatives, see our pizza flour guide.
Hydration and how to adjust
63.6% effective hydration puts this formula toward the lower end of what most sourdough pizza recipes use. It's workable for beginners and produces a manageable dough.
To adjust for different styles:
| Style | Effective Hydration | Notes |
|---|---|---|
| Neapolitan | 60-65% | Classic range, extensible but not sticky |
| New York | 62-65% | Slightly stiffer for hand tossing |
| Roman al taglio | 75-85% | Very wet, baked in pan, not hand-stretched |
| Focaccia-style | 70-80% | Pan baked, open crumb |
If you're new to high-hydration doughs, start at 60% and work up in 2% increments as your technique improves. Adding hydration without the corresponding technique produces sticky, unmanageable dough, not better pizza. For a deep dive into hydration decision-making, see our pizza dough hydration guide.
How to make sourdough pizza dough
Dough temperature: the variable most bakers skip
Fermentation rate is primarily driven by dough temperature, not ambient temperature. A dough that comes out of the mixer at 80°F (27°C) will ferment significantly faster than one at 70°F (21°C), even in the same room.
Target dough temperature: 75-78°F (24-26°C)
To hit this target, adjust your water temperature before mixing. If your kitchen is warm, use cold water; if your kitchen is cool, use warm water. For precision, use the following calculation:
Water temperature = (Target dough temp × 3) - (flour temp + room temp + friction factor)
For hand mixing, friction factor is typically 0°F. For machine mixing, it's 15-25°F depending on mixer speed and duration.
In practice: if your flour and room are both at 68°F (20°C) and you're hand mixing, water at roughly 90°F (32°C) will get you close to a 76°F (24°C) finished dough. Use an instant-read thermometer to check your mixed dough and adjust on the next batch.
Autolyse
Autolyse is a pre-mix rest that improves dough extensibility and reduces mixing time. The traditional method uses flour and water only, no starter, no salt.
Traditional autolyse: Combine flour and water, mix until no dry flour remains, cover, and rest 20-60 minutes. Then add starter and salt.
Fermentolyse: Some bakers add the starter during the autolyse rest and add salt after. This accelerates fermentation slightly and can improve incorporation. Purists argue it's not a true autolyse since fermentation has begun, but practically it often works well for pizza dough.
Either approach is valid. For longer cold ferments (48-72 hours), traditional autolyse is preferable since you want to minimize early fermentation activity. For same-day doughs, fermentolyse can give you a head start.
Mixing and salt addition
Bulk fermentation with stretch-and-fold or coil folds
After mixing, the dough enters bulk fermentation, where flavor development and gluten strength build together. Passive rest alone works, but a series of folds significantly improves final dough strength and open crumb structure.
Stretch-and-fold method: During the first 2-3 hours of bulk, perform a set of stretch-and-folds every 30-45 minutes. One set = four folds (grab one side of the dough, stretch up and fold over the center, rotate 90°, repeat four times). After 3-4 sets, the dough becomes noticeably more cohesive and extensible.
Coil folds: A gentler alternative for highly extensible doughs. Lift the dough from underneath the center, let it hang, then lay it down over itself. Rotate the container 180° and repeat. One set = 4 repetitions. Coil folds work especially well for Tipo 00 doughs, which can tear more easily with aggressive stretch-and-fold.
Tip: Wet hands prevent sticking during folds. Never add flour to the dough at this stage.
For same-day doughs, perform 3-4 sets of folds, then proceed to balling. For overnight or cold ferment doughs, perform your folds during the room-temperature portion (2-4 hours) before refrigerating.
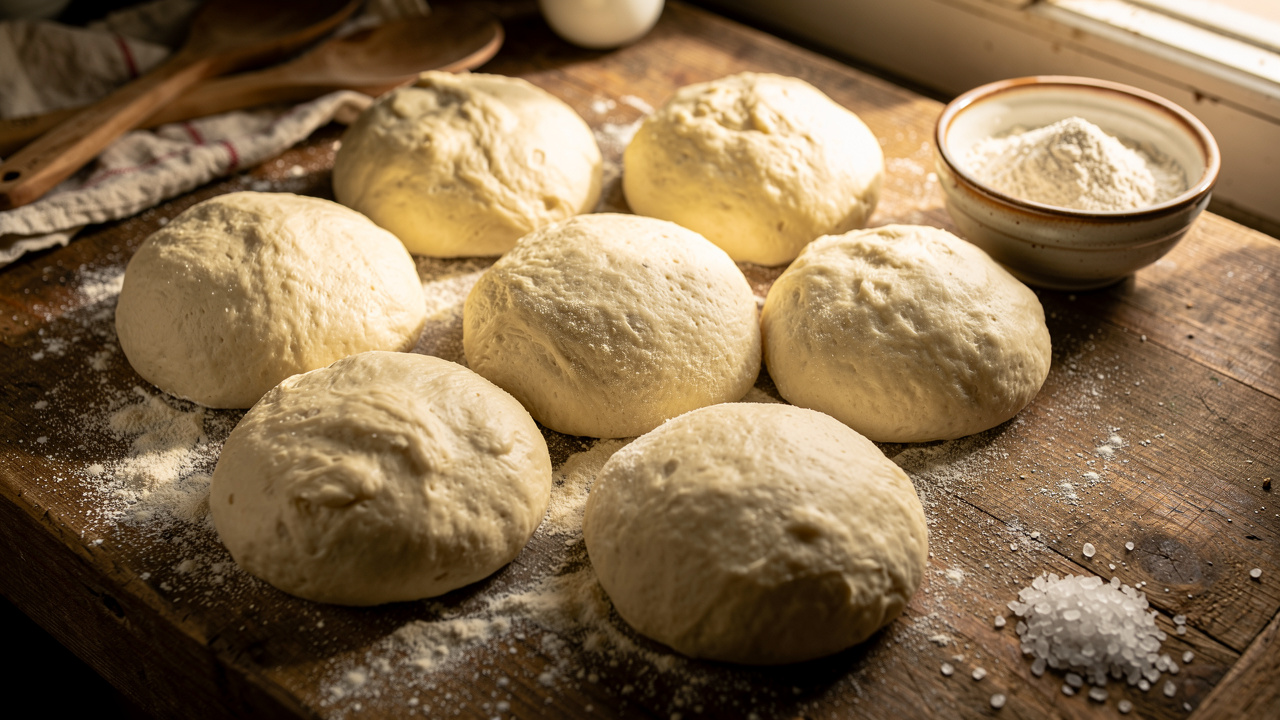
Dividing and balling
After bulk fermentation, divide the dough and shape into tight balls. Pre-shaping technique matters here:
For cold fermentation, refrigerate immediately after balling. For same-day, rest at room temperature until ready to stretch.
Sourdough pizza dough fermentation schedules
Best for: When you need pizza today and have an active starter.
Starter level used: 30-35% of flour weight.
- Feed starter in the morning, targeting peak activity 1-2 hours before you plan to mix.
- Mix dough mid-morning (autolyse 30 min, then add starter and salt).
- Bulk ferment at room temperature (75-78°F) for 4-5 hours, performing 3-4 sets of folds in the first 2 hours.
- Ball the dough and rest covered at room temperature for 1-2 hours until puffed and slightly jiggly.
- Stretch and bake.
Flavor profile: Mild tang, less complexity than cold-fermented, still significantly better than same-day commercial yeast.
Note: Timing depends entirely on your starter's activity and your kitchen temperature. In a warm kitchen (80°F+), fermentation accelerates; reduce starter to 20-25% to maintain control.
::tab{title="Overnight (12-16 Hours)"}
Best for: Planning ahead for next-day pizza with better flavor and more flexibility.
Starter level used: 20-25% of flour weight.
- Mix dough in the afternoon or evening.
- Bulk ferment at room temperature for 2-3 hours with folds.
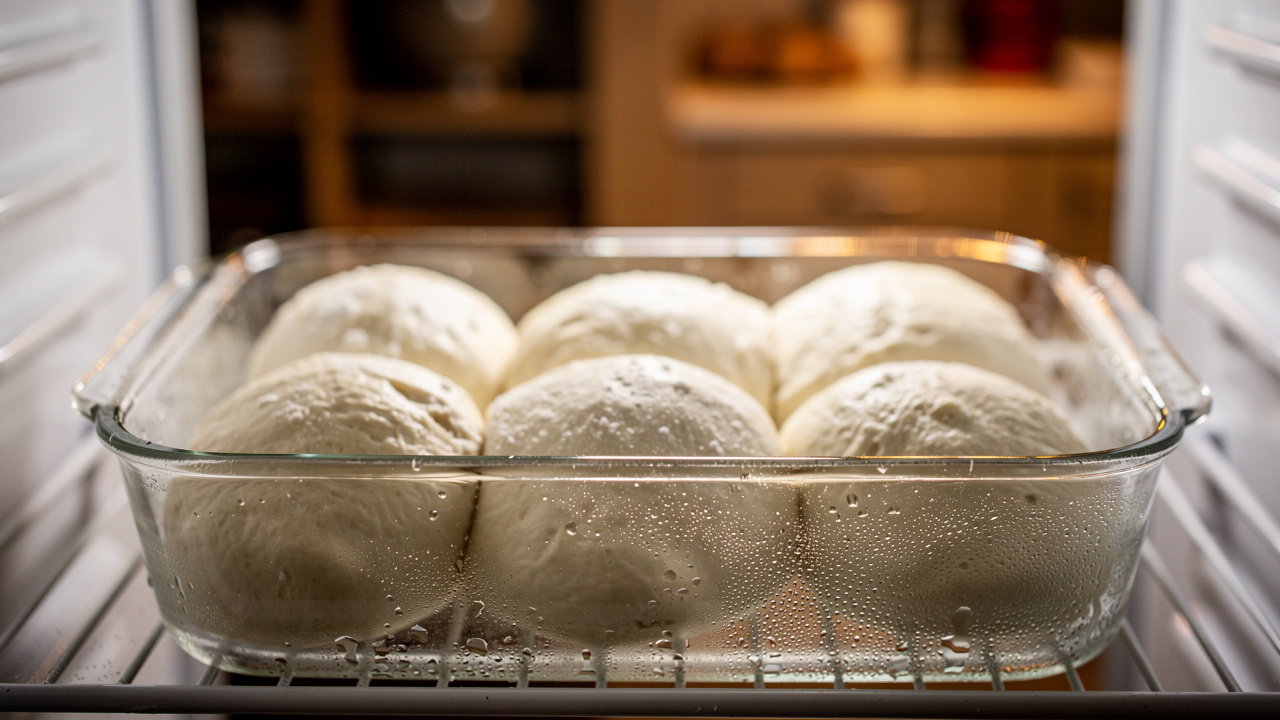
- Ball the dough and refrigerate overnight (10-14 hours).
- Remove from refrigerator 1-2 hours before baking to temper.
- Stretch and bake.
Flavor profile: Mild to moderate tang, noticeably more complex than same-day.
Tip: This schedule gives you significant flexibility. If plans change, the dough can stay in the refrigerator an additional 12-24 hours in most cases.
:::
::tab{title="Long Cold Ferment (48-72 Hours)"}
Best for: Maximum flavor development; planning 2-3 days ahead.
Starter level used: 10-20% of flour weight.
- Mix dough, autolyse 45-60 minutes.
- Bulk ferment at room temperature for 2-3 hours with folds.
- Ball the dough and refrigerate for 48-72 hours.
- Remove from refrigerator 2-3 hours before baking (very cold dough is difficult to stretch).
- Stretch and bake.
Flavor profile: Complex, well-developed tang, open crumb structure, excellent browning.
Warning: Past 72 hours, over-fermentation risk increases significantly. Watch for signs of dough degradation (see Troubleshooting section).
For a detailed breakdown of cold fermentation science and technique, see our cold fermentation guide.
:::
Shaping and stretching sourdough pizza dough
The poke test: knowing when your dough balls are ready
Before you stretch, your dough balls need to be properly proofed. Use the poke test:
- Press one finger about 1cm into the dough ball and release.
- Underproofed: The indent springs back immediately and completely. Give it more time.
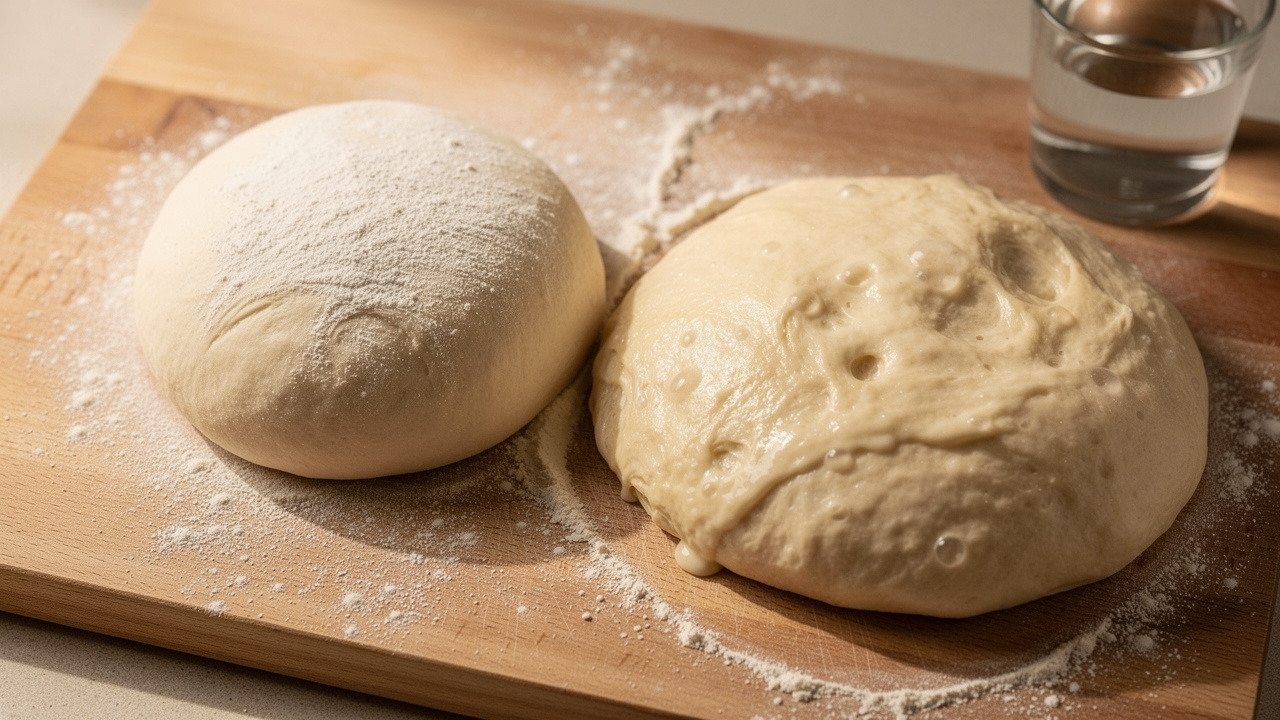
- Ready: The indent springs back slowly and only about halfway.
- Overproofed: The indent barely springs back, or the dough feels slack and deflated. Proceed carefully with gentle handling; it may still make acceptable pizza but will be harder to work with.
Stretching technique
Well-fermented sourdough dough is extensible, sometimes dramatically so. This is a feature, not a problem, but it requires a different approach than firmer commercial yeast doughs.
Semolina vs. flour for the peel
Semolina (fine or coarse) works significantly better than plain flour for transferring pizza to the oven. Semolina acts like ball bearings, preventing the dough from sticking to the peel during the window between stretching and launching. Plain flour absorbs moisture from the dough quickly and causes sticking, which is catastrophic mid-launch.
Use a generous layer of semolina on your peel, assemble your pizza quickly, and test that it slides freely before adding toppings by giving the peel a small shake. If it's stuck, lift the edges and add more semolina underneath.
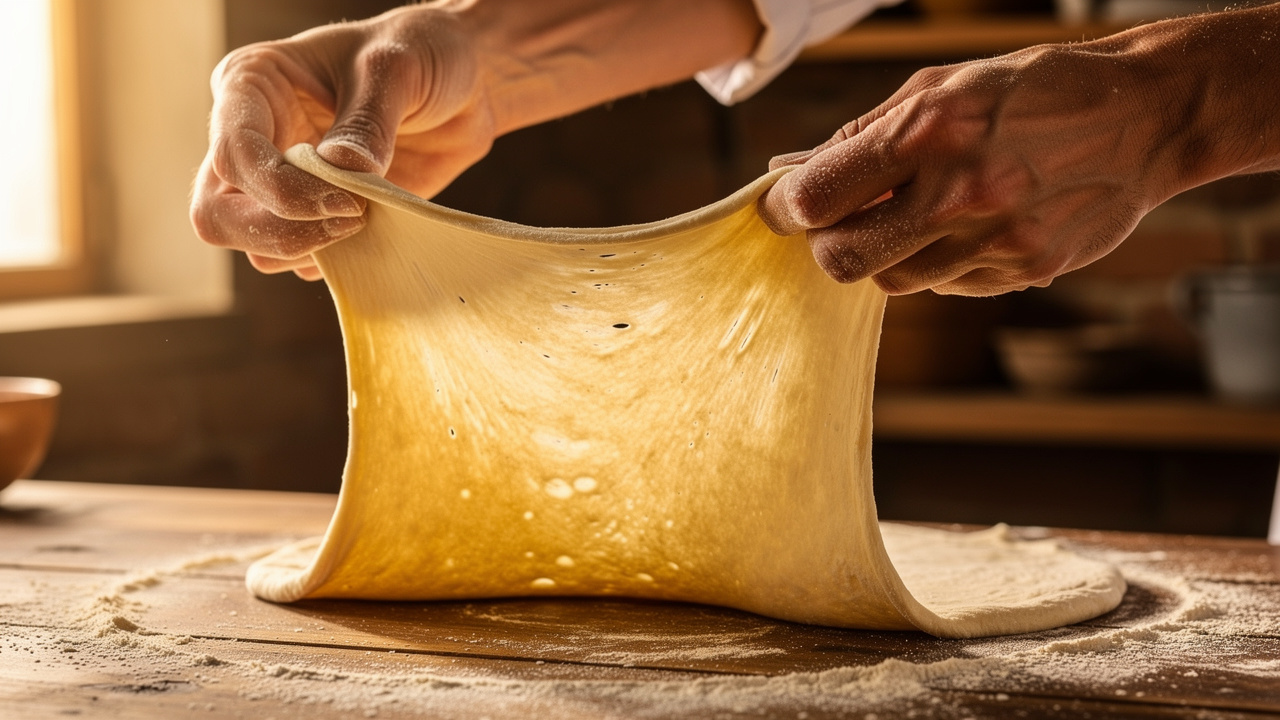
Handling very extensible dough
After 48-72 hours of cold fermentation, sourdough pizza dough can become extremely extensible, almost translucent when stretched thin. This is normal and usually desirable, but requires gentle handling:
- Use two hands to support the dough at all times.
- Avoid point-stretching (pulling from a single spot), which tears thin areas.
- Work quickly once on the peel; the dough continues to relax and can stretch beyond your target size.
- If the dough tears repeatedly, it may be slightly over-fermented or not fully tempered. Rest it 10 minutes and try again.
Baking sourdough pizza
Equipment and heat
High heat is non-negotiable for good pizza. The goal is to cook the base quickly while the toppings heat through.
- Home oven with pizza stone or steel: Preheat at maximum temperature (typically 500-550°F / 260-290°C) for at least 45-60 minutes. A steel retains and conducts heat better than stone and is worth the investment for regular pizza baking.
- Pizza oven (Ooni, Gozney, etc.): Follow manufacturer's guidance, typically 700-850°F (370-455°C) for 60-90 seconds.
- Cast iron skillet method: Preheat skillet on the stovetop until smoking, add stretched dough, add toppings, transfer to broiler.
For a detailed equipment comparison including stone vs. steel, see our pizza equipment guide.
Why sourdough browns well
Sourdough pizza crust develops excellent color for reasons rooted in the chemistry of long fermentation. The Maillard reaction, which drives browning and flavor development in the crust, requires amino acids and reducing sugars at heat. Long fermentation produces a higher concentration of free amino acids from protein breakdown. The slightly acidic dough environment (lower pH) also promotes certain Maillard pathways.
As Serious Eats explains in their pizza science guide, the claim that sourdough browns better because of "higher free sugar content" is incorrect. After 24-72 hours of active fermentation, most available sugars have been consumed. The browning advantage comes from amino acid concentration and pH, not excess sugar.
Baking times and temperatures
| Setup | Temperature | Bake Time |
|---|---|---|
| Home oven, pizza steel | 500-550°F (260-290°C) | 7-10 minutes |
| Home oven, pizza stone | 500-550°F (260-290°C) | 8-12 minutes |
| Pizza oven | 700-850°F (370-455°C) | 60-120 seconds |
| Cast iron + broiler | Broiler + 550°F stovetop | 4-6 minutes |
Watch for leopard spotting (dark blisters) on the cornicione as an indicator of proper high-heat baking. Sourdough crust should be deeply browned with charred spots at the right points, not uniformly pale.
Sourdough discard pizza dough
If you maintain a sourdough starter, you accumulate discard, and pizza dough is one of the best uses for it. Discard dough is not the same as active-starter sourdough pizza; it's a hybrid approach.
Use sourdough discard for flavor while relying on commercial yeast for leavening power. This is the most reliable option when your discard may have been refrigerated for days or weeks.
Substitute 100-150g of discard for an equal weight of flour and water combined (so 100g of 100% hydration discard = 50g flour + 50g water). Reduce your recipe flour and water accordingly. Add 3-5g instant yeast per 500g flour for reliable leavening.
Ferment 2-4 hours at room temperature, or overnight in the refrigerator.
Result: Good sourdough flavor without the fermentation uncertainty of using weak discard alone.
::tab{title="Discard Only (No Commercial Yeast)"}
Using discard as the sole leavening works only if your discard is relatively fresh (1-5 days old) and was refrigerated, not held at room temperature for extended periods. Old, very sour discard has exhausted yeast populations and won't leaven adequately.
Use a higher percentage: 30-40% discard relative to flour weight. Plan for a longer fermentation than with active starter at peak, typically 8-12 hours at room temperature.
Test a small piece: if it floats in water after a few hours, fermentation is active. If it sinks and shows no bubbling after 4-5 hours, your discard doesn't have enough yeast activity to leaven the dough.
Result: More variable than active starter or discard+yeast, but can produce good pizza with the right discard.
:::
Troubleshooting sourdough pizza dough
Common problems, causes, and remedies
Dough won't rise / very slow fermentation
*Cause:* Starter not at peak activity, dough too cold, or starter not healthy.
*Remedy:* Move the dough somewhere warmer (70-78°F). If it's been 8+ hours at room temperature with no visible rise, the starter may be the issue. For future batches, confirm starter health before mixing by tracking rise and using visual cues rather than the float test. Rebuild starter health with regular feedings before the next bake.
---
Dough tears when stretching
*Cause:* Underproofed, too cold, or gluten hasn't relaxed sufficiently.
*Remedy:* If the dough just came out of the refrigerator, let it temper at room temperature for 2-3 hours. If it's already tempered, cover and rest 10-15 minutes, then try again. Forcing cold, tight dough tears it; time and patience fix it.
---
Dough is too sticky to handle
*Cause:* High hydration, over-fermented dough with broken-down gluten, or insufficient bench flour.
*Remedy:* Use wet hands or a light dusting of bench flour. If the dough is severely slack (see over-fermentation below), semolina on the peel becomes even more important since the dough will stick aggressively. For future batches, reduce hydration by 5% or shorten fermentation time.
---
Crust is pale and doesn't brown properly
*Cause:* Oven not hot enough, stone or steel not preheated long enough, or dough over-fermented (depleted sugars and amino acids).
*Remedy:* Add 15-20 more minutes to preheat time. For over-fermented dough, a small amount of added sugar (1-2 tsp per batch) can help browning in future batches, though this partially undermines the sourdough character. Better solution: fix fermentation timing.
---
Crust is chewy and gummy inside
*Cause:* Undercooked (insufficient bake time or temperature), or too much moisture from toppings.
*Remedy:* Bake longer. For home ovens, err toward more time. Wet ingredients like fresh mozzarella or vegetables release steam; pat mozzarella dry with paper towels and consider partially cooking vegetables before topping.
---
Pizza sticks to the peel
*Cause:* Not enough semolina/flour under the dough, or the pizza sat on the peel too long before launching.
*Remedy:* Before adding toppings, confirm the dough slides freely with a gentle shake. If it's stuck, use a bench scraper to lift edges and add more semolina underneath. Assemble and launch quickly; do not prepare pizza on the peel minutes in advance.
What over-fermented dough looks like
Over-fermented sourdough pizza dough is one of the more frustrating outcomes because it's hard to salvage. Signs:
- Dough balls have collapsed or look visibly deflated and sunken
- The dough is extremely slack, spreading flat immediately when handled
- Stretching reveals a very weak structure; the dough tears easily
- It smells strongly alcoholic or very sour (past pleasant tang)
- Bubbles throughout the dough are very large and irregular when cut
Can it be saved?
Mildly over-fermented dough (slightly slack, still holds some shape) can still make acceptable pizza. Handle it very gently, use generous semolina, keep toppings light, and bake it. The crust will be flatter, the cornicione won't puff as much, and the flavor may be quite sour, but it's edible.
Severely over-fermented dough, where gluten has significantly degraded and the dough holds no structure, is very difficult to save as pizza. Options: use it as focaccia (baked in a pan, no stretching required), or fold it into your next batch as discard since it still contains viable organisms.
Prevention is the practical answer. Use less starter, reduce dough temperature, or shorten fermentation time on the next batch. For more fixes, see our pizza dough troubleshooting guide.
Sourdough vs. commercial yeast pizza dough
| Factor | Sourdough | Commercial Yeast |
|---|---|---|
| Leavening time | 8-72 hours | 1-4 hours |
| Flavor complexity | High | Low to moderate |
| Fermentation control | More variables | Predictable |
| Browning | Excellent | Good |
| Digestibility | Slightly better | Standard |
| Consistency | Variable | Reliable |
| Best for | Planning ahead, flavor-focused | Fast, reliable results |
| Starter required | Yes | No |
| Crumb structure | Open, irregular | More uniform |
The honest answer is that commercial yeast makes excellent pizza, particularly for same-day baking. Sourdough's advantages are most apparent with cold fermentation schedules of 24 hours or more, where the extended time allows flavor development that commercial yeast cannot replicate in the same window.
Combining sourdough with other techniques
Sourdough doesn't have to operate in isolation. Combining it with other pre-ferment methods produces results that exceed what either approach delivers alone.
Sourdough with cold fermentation
This is the most common and impactful combination for home bakers. Using 15-20% starter and cold-fermenting for 48-72 hours produces the most complex flavor of any approach in this guide. The cold environment slows yeast activity while bacterial activity continues at a gentler pace, shifting the flavor profile toward lactic acid (creamy, mild) rather than acetic acid (sharp, vinegary).
Cold fermentation also gives you timing flexibility: your dough is ready when you are, within a reasonable window, rather than requiring you to bake at exactly the right moment. For full technique details, see our cold fermentation guide.
Sourdough with a poolish or biga
Some pizzerias use both a sourdough starter and a poolish or biga in the same dough, treating the sourdough as a flavor contributor alongside the pre-ferment's leavening role. The poolish (100% hydration pre-ferment) adds wheaty complexity and extensibility; the sourdough adds characteristic tang and contributes to browning.
A practical combination: build a poolish with 10% of your total flour using 0.1% commercial yeast, ferment 12-16 hours. Mix the remaining flour, water, poolish, and starter (10-15%) into your final dough. The result is a highly complex flavor profile with reliable fermentation from both leavening agents.
For a detailed explanation of poolish and biga methods, see our poolish vs. biga guide.
Sourdough for Roman pizza al taglio
Roman al taglio (pizza by the cut) uses a much higher hydration dough, typically 75-85%, baked in rectangular pans. Sourdough performs well in this format because the pan handles the structural demands that hand-stretching would otherwise require. The higher hydration is more manageable when you're simply pouring the dough into an oiled pan and dimpling it like focaccia.
Use 20-25% starter, 80% hydration, and a 24-48 hour cold ferment. The result is an extremely open, airy crumb that holds up well under heavy toppings. For the full method, see our Roman pizza al taglio guide.
Getting consistent sourdough pizza dough results
Sourdough pizza has a reputation for unpredictability that is partly deserved and partly the result of bakers skipping the foundational controls: starter timing, dough temperature, and consistent fermentation conditions. Once you dial in these variables for your specific kitchen and starter, sourdough pizza dough is repeatable and reliable. King Arthur Baking's sourdough guide covers starter maintenance in detail if you want to go deeper on keeping your culture healthy.
Keep notes on your batches. Record your starter feeding time, dough temperature after mixing, ambient temperature, fermentation duration, and the result. After five or six batches, you'll have enough data to make adjustments rather than guesses. A kitchen scale and instant-read thermometer are essential for this kind of precision.
The extra time pays off in a crust that commercial yeast dough, however well made, cannot replicate.
Frequently Asked Questions
Use 20-25% of your total flour weight for most pizza applications. With 700g flour, that's about 175g of starter. Lower percentages (10-15%) suit long cold ferments and produce subtle flavor; higher percentages (30-35%) work for same-day bakes where you need faster fermentation. Always use starter at peak activity, when it has a domed top, bubbles throughout, and has roughly doubled since its last feeding.
Yes. Use 30-35% starter and plan for 6-8 hours total. Feed your starter in the morning to target peak activity 1-2 hours before you want to mix. Bulk ferment 4-5 hours at room temperature with stretch-and-fold sets, then ball the dough and rest 1-2 more hours before baking. This works best in kitchens above 72°F (22°C) with a very active starter.
The most common cause is a starter that isn't at peak activity. Your starter should have a domed top, bubbles on the surface and sides, and smell yeasty and mildly tangy before you use it. Other causes: dough temperature below 70°F (21°C), which slows fermentation significantly, or a starter that needs reviving with a few days of consistent feedings before it's reliable enough for pizza.
Yes, with a caveat. The most reliable approach combines discard with a small amount of commercial yeast: 100-150g discard plus 3-5g instant yeast per 500g flour. The discard provides sourdough flavor while the commercial yeast guarantees rise. Using discard alone works only if it's fresh (within 5 days, refrigerated) and you use a higher percentage (30-40%) with an extended fermentation of 8-12 hours.
Tipo 00 flour (11-12% protein) produces a silkier, more extensible dough that's ideal for Neapolitan-style pizza and browns well at high heat. Bread flour (12-14% protein) builds a stronger gluten network that handles higher hydrations better and is more forgiving during shaping. For beginners, bread flour is the more forgiving choice; for Neapolitan-style results, Tipo 00 is worth trying once you're comfortable with extensible doughs.
Sourdough pizza dough is at its best within 24-72 hours of mixing. Beyond 72 hours, the acidity increases and the gluten structure weakens, making the dough harder to handle and overly sour. For longer storage, freeze the dough balls after a 24-hour cold ferment. They'll keep for up to 2 months and can be thawed overnight in the refrigerator.
Use the poke test: press one finger about 1cm into the dough ball and release. If the indent springs back immediately and completely, the dough needs more time. If it springs back slowly and only halfway, it's ready. If it barely springs back, the dough is overproofed and should be handled gently. For cold-fermented dough, always let it temper at room temperature for 1-2 hours first so it's pliable enough to stretch without tearing.
Sourdough crust browns through the Maillard reaction, which requires free amino acids and heat. Long fermentation produces a higher concentration of free amino acids from protein breakdown, which drives more Maillard activity. The slightly acidic dough environment also influences how these reactions proceed. Contrary to a common claim, it's not because sourdough dough has more residual sugars. After 24-72 hours of active fermentation, most available sugars have been consumed.